Easy to Follow Step-By-Step Guide, Dosing Suggestions, & Benefits
As culinary have become mainstream, many have been discovering the benefits of their use. Much of their benefits stem around mental health. Mushrooms have been used for centuries* and possibly for millenia, yet it is only recently that their benefits have been closely studied. Mushrooms have been used to help manage anxiety, depression, PTSD, and other mental health issues.

So why would someone choose to drink a mushroom tea rather than just eating the dried mushrooms. Well, there are a few reasons. For one, taste. If you have never eaten dried mushrooms, many find them to be pretty nasty tasting. They are a bit hard to chew and leave bits in your mouth and the taste is not great the whole time. Mushroom tea not only does not taste bad, but you can add flavors you enjoy and make a good tasting cup of tea.
When ingesting mushrooms via tea rather than eating them, the onset of the effects is much quicker. You will most likely begin to feel the effects within 30 minutes rather than waiting the 1.5 hours that dried mushrooms need to take effect. Not only that, but the effects do not last as long as with dried mushrooms. The effects felt from mushroom tea usually subside in about 4 hours compared to the 8+ hours when eating dried mushrooms


Learning how to make mushroom tea is not much different than making a standard cup of tea. It involves steeping your ingredients in water to extract the flavors and active molecules. To create your very own mushroom tea, you will need dried mushrooms, a clean herb grinder, a lemon slice or two, some water, a heating element, 2 mugs, a fine kitchen strainer, and whatever additions you want to add (like honey, ginger, or a regular tea bag).
To begin the process of how to make mushroom tea, grind your mushrooms into a coarse powder. Be careful not to overgrind as this will make straining difficult. Take your ground mushrooms and add them to your first mug. Now, squeeze a slice of lemon over the mushrooms.
If you are using more than 3.5 grams, you may consider 2 lemon slices. Next, pour enough room temperature water over the mushrooms to fully submerge them. This will allow the lemon acid to mix with the water and interact with all of the mushrooms, thereby extracting the active molecules. Let this mixture sit for 15 minutes. In the meantime, move onto the next step.
Use your 2nd mug to steep your flavor additions of a bag of tea just like brewing any other cup of tea by pouring boiling water over the ingredients. Once you have your mug of tea and your mushroom mug has been sitting for 15 minutes, it is time to combine the two.
Pour your mushroom water through a very fine strainer and into the 2nd mug containing your tea. The goal here is to remove the little bits of dried mushrooms. Once combined, you are ready to drink that delicious mushroom tea! If you want to save it for later, place it in an airtight container and leave it in the refrigerator. It will stay good for about 2 weeks.
Best Mushrooms to Use, the Benefits, & a Step-by-Step Guide
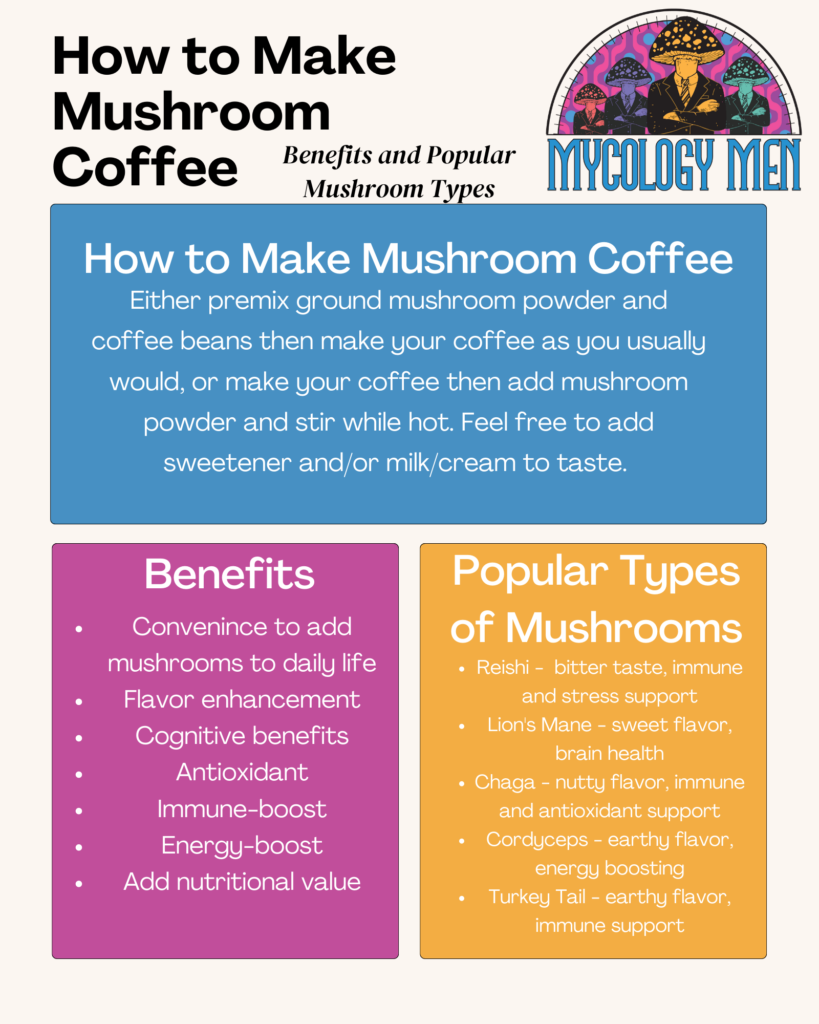
Mushroom Coffee has become increasingly popular in recent years. You can find ready-made blends at Whole Foods and other health food stores pretty easily. It's a perfect combination of everything that is great about coffee with the added cognitive and immune system benefits of functional mushrooms. Ready made blends can be great, but it is relatively easy to make your own mushroom coffee blends that fit your exact needs. You can choose exactly which mushrooms and how much goes into each blend. If you really want to dive in, you can buy mushroom liquid cultures, grow your own mushrooms, then make coffee with that! In this article we will lay out the exact steps to make your own mushroom coffee and discuss the benefits of adding functional mushrooms to your daily cup of joe. Let’s take a look!

Cinnamon, cocoa powder, milk/cream, honey, maple syrup, etc.
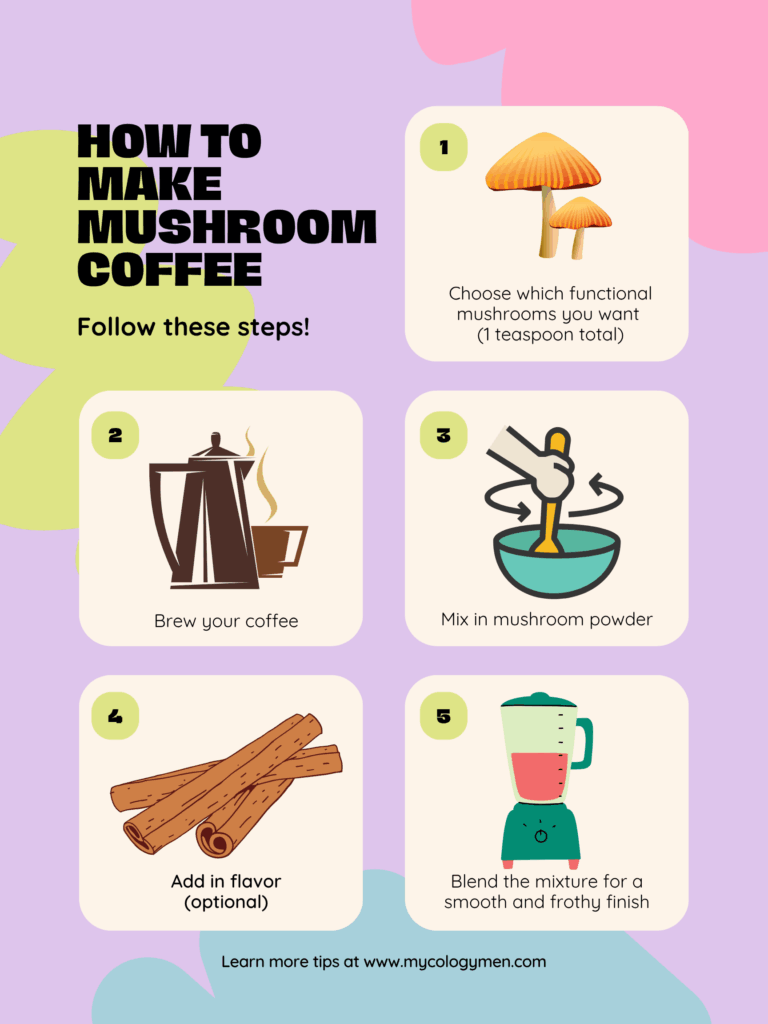
Choose the functional mushrooms for your blend
Choose which functional mushrooms you want in your blend for the day. You can choose from the list above our go wild and do whatever you want! You will need 1 teaspoon of mushroom powder per cup of coffee (about 8 ounces). If you have whole mushrooms, grind them up using a food processor.
Brew your cup of coffee like you usually would using a french press, drip machine, espresso maker, or pour-over setup. This will be the base of your mushroom coffee.
You can choose to add the mushroom powder either before or after brewing your cup of coffee. If you choose to add the mushroom powder in before brewing, just mix it in with the ground coffee beans. If you choose to add in the mushroom powder after brewing your cup of coffee, make sure to stir it in well. It can be helpful to use a shaker to really mix it up.
If you want to add in any flavor like the options listed above, add just a small amount to your brewed coffee/mushroom mix and stir it in really well.
Add the coffee/mushroom/flavor mixture to a blender and let it blend for 20 seconds. This will give you a smooth and frothy cup of mushroom coffee!
Many people have begun to drink mushroom coffee for just a little extra wellness boost with their daily cup of joe. Not everyone enjoys the taste of mushrooms, but that does not mean you cannot sneak it into your diet like with mushroom coffee. Mushroom coffee can be a great way to add some wellness benefits to your routine. Most enjoy their mushroom coffee in the morning because it can help with the jitters you may get after a regular cup of coffee. It can also be enjoyed in the afternoon for a boost of energy like with cordyceps.
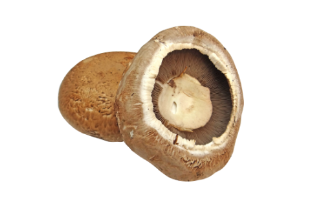
Mushrooms are a unique and tasty addition to any meal, and growing them is not only a fun hobby, but also a way to ensure a steady supply of fresh mushrooms. While many people opt to grow standard edible mushrooms such as button mushrooms, portobellos, and shiitakes, growing wild mushrooms can be a fun and rewarding challenge. In this article, we will provide you with a step-by-step guide on how to grow wild mushrooms.
Before you start to grow wild mushrooms, it is important to do your research. There are many different types of wild mushrooms, and not all of them are safe for consumption. Some wild mushrooms are highly poisonous and can be fatal if ingested. Therefore, it is important to be familiar with the types of wild mushrooms that are safe to eat.
Some popular edible wild mushrooms include morels, chanterelles, and porcini. However, there are many other types of wild mushrooms that are also safe to eat. A good place to start is by consulting a field guide on how to grow wild mushrooms or attending a foraging class to learn about the different types of wild mushrooms in your area.
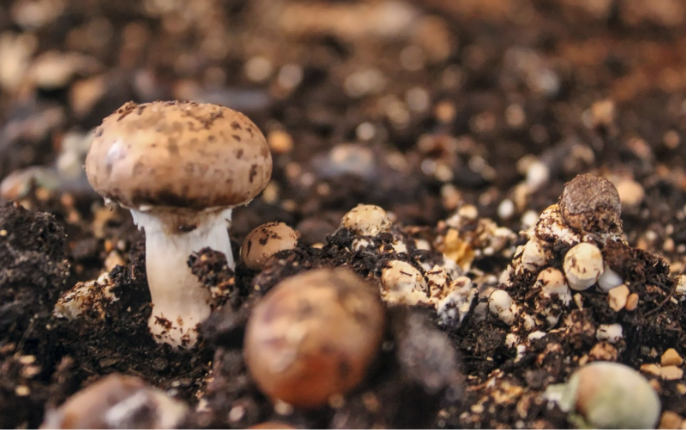
Once you have decided which type of wild mushroom you want to grow, you need to choose a growing medium. Wild mushrooms typically grow in soil, but they can also grow on decaying organic matter such as wood chips, sawdust, or straw.
For example, if you want to grow morels, you will need to use a growing medium that is high in nitrogen, such as compost or manure. Morels typically grow in the spring and require a moist environment, so you will need to make sure the growing medium is kept moist and warm.
Chanterelles, on the other hand, typically grow in the fall and require a slightly acidic environment. They can be grown on a substrate of hardwood sawdust, mixed with bran or other nitrogen sources.
Porcini can be grown on a mixture of hardwood sawdust and wheat bran, with a touch of gypsum for texture.
Once you have chosen a growing medium, the next step is to inoculate it with mushroom spawn. Mushroom spawn is essentially mushroom spores that have been grown on a nutrient-rich substrate. You can buy mushroom spawn online or from a local nursery.
To inoculate your growing medium, simply mix the spawn into the substrate and keep it moist and warm. The spawn will eventually grow into a network of mycelium, which will then produce mushrooms.
Wild mushrooms require specific conditions to grow, so it is important to provide the right environment. Generally speaking, wild mushrooms prefer a warm, humid environment with good air circulation.
To create the right conditions, you can place your growing medium in a greenhouse, or in a warm, humid location in your home. If you are growing mushrooms on sawdust or straw, you can cover the growing medium with plastic to help retain moisture.
Once your mushrooms have matured, it is time to harvest them. This can be done by gently pulling the mushroom cap away from the stem, or by cutting the stem at the base with a sharp knife.
It is important to harvest mushrooms at the right time, as they can quickly become overripe and lose their flavor. Generally, wild mushrooms are ready to harvest when the caps are fully formed and the edges begin to curl under.
After you have harvested your mushrooms, it is important to store them properly. Wild mushrooms can be stored in the refrigerator for up to a week, or they can be dried or frozen for long-term storage.
When storing wild mushrooms in the refrigerator, it is best to wrap them in a damp paper towel and place them in a paper bag. This will help to prevent them from drying out too quickly. However, it is important to use your mushrooms as soon as possible, as they will continue to lose flavor and nutritional value over time.
If you want to preserve your mushrooms for longer periods of time, you can dry them or freeze them. To dry mushrooms, simply spread them out on a baking sheet and place them in a warm, dry location. They will slowly dehydrate over time, and can be stored in an airtight container for up to a year.
Freezing mushrooms is another option for long-term storage. To freeze mushrooms, simply clean and chop them into bite-sized pieces, and place them in an airtight container or freezer bag. They can be frozen for up to six months.
While learning how to grow wild mushrooms can be a fun and rewarding experience, there are some important tips to keep in mind to ensure success.
First and foremost, it is important to be patient. Wild mushrooms can take several weeks or even months to mature, so it is important to be patient and wait for them to grow.
Secondly, it is important to maintain the right growing conditions. This means keeping the growing medium moist and warm, and providing good air circulation.
It is also important to keep your growing area clean and free of pests. Insects and rodents can quickly destroy a mushroom crop, so it is important to keep your growing area clean and free of any potential pests.
Finally, it is important to be safe when foraging for wild mushrooms. While there are many delicious and safe wild mushrooms, there are also many poisonous mushrooms that can be deadly if ingested. Always consult a field guide or an expert before consuming any wild mushrooms and to help learn how to grow wild mushrooms.
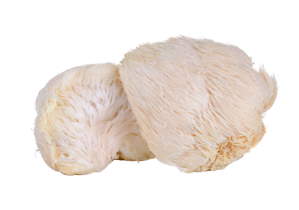
Lion’s mane mushrooms seem to be everywhere in the mushroom community these days. They have gained widespread popularity for their wellness benefits, unique look, and ease of growing at home. You can find Lion’s mane in teas, coffees, restaurants, your neighbor’s kitchen, on the internet, etc. The list goes on.
Luckily for us all, Lion’s Mane are pretty easy to grow in the comfort of your own home. With a few key tools and a simple instruction guide, you can get started on your own journey of mushroom growth. We are here to give you that guide plus a few tips and tricks to help you along the way. We will also provide you with a few simple recipes to use your newly grown Lion’s Mane mushrooms in.
Things You Will Need
Lion’s Mane mushroom spawn can be purchased from online retailers (look here!).
Substrate is the material in which your mushrooms will grow. For Lion’s Mane, this means either pasteurized sawdust or hardwood chips. To begin, hydrate the sawdust or hardwood chips so they are moist, but not soaking. The sawdust, when squeezed, shouldn’t drip a ton of water (too wet) or fall apart (too dry). Hardwood chips may need to be soaked for 12 hours.
Next, pack your sawdust or wood chips into a mushroom grow bag with a filter (these can be purchased online). Don’t pack it too tight, but not too loose either. Make sure to leave about 2 inches of space at the top.
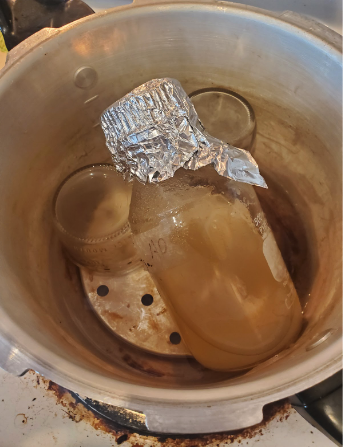
Now, place the packed bags into a pressure cooker. Let it sit at 15 PSI for 2 hours so it sterilizes. This will kill off unwelcome bacteria and such.
Finally, let the bag cool to room temperature before you continue. Hot bags will kill mycelium so don’t rush this!
Once the bags have cooled, you can mix in your mushroom spawn. Try to evenly distribute it throughout the bag.
Mushrooms like it warm and wet so controlling the environment is key. Try and keep the mushrooms in a place that is about 75F and 80% humidity. You can use a thermometer to check the temperature and a humidifier to pump up the humidity.
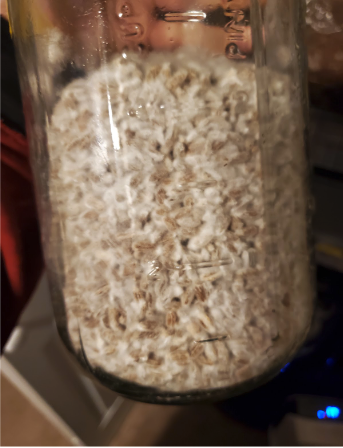
In just a few days you will start to see mycelium appear as white, web-like filaments that spread throughout the substrate. This is a great start!
The mycelium will continue to grow and expand until it has completely filled your bag with substrate. Once this happens, you are ready to push it into the fruiting stage. This is accomplished by changing the environment to be cooler and darker. You can also slightly open the top of the bag to allow fresh air in.
The mushrooms will start as little tiny white pins, and then form into full grown Lion’s Mane mushrooms. Heck yes!
When the mushrooms grow to be about 3 inches in diameter, they are ready to harvest. Cut the mushrooms at their base with a sharp knife. Throw them in a paper bag and keep in the fridge for up to a week. Plastic bag storage is not recommended because that will trap moisture inside.
Lion’s Mane mushrooms have been shown to decrease the risk of neurological diseases like Alzheimer’s. They can also boost your cognitive functioning. (source)
Lion's Mane mushrooms contain beta-glucans, which are compounds that have been shown to enhance immune function and help the body fight off infections and diseases. (source)
Lion’s Mane mushrooms contain certain compounds that can help with gut health. (source)
Lion’s Mane mushrooms might be most well known for their anti-inflammatory properties. This can help to ward off chronic diseases. (source)
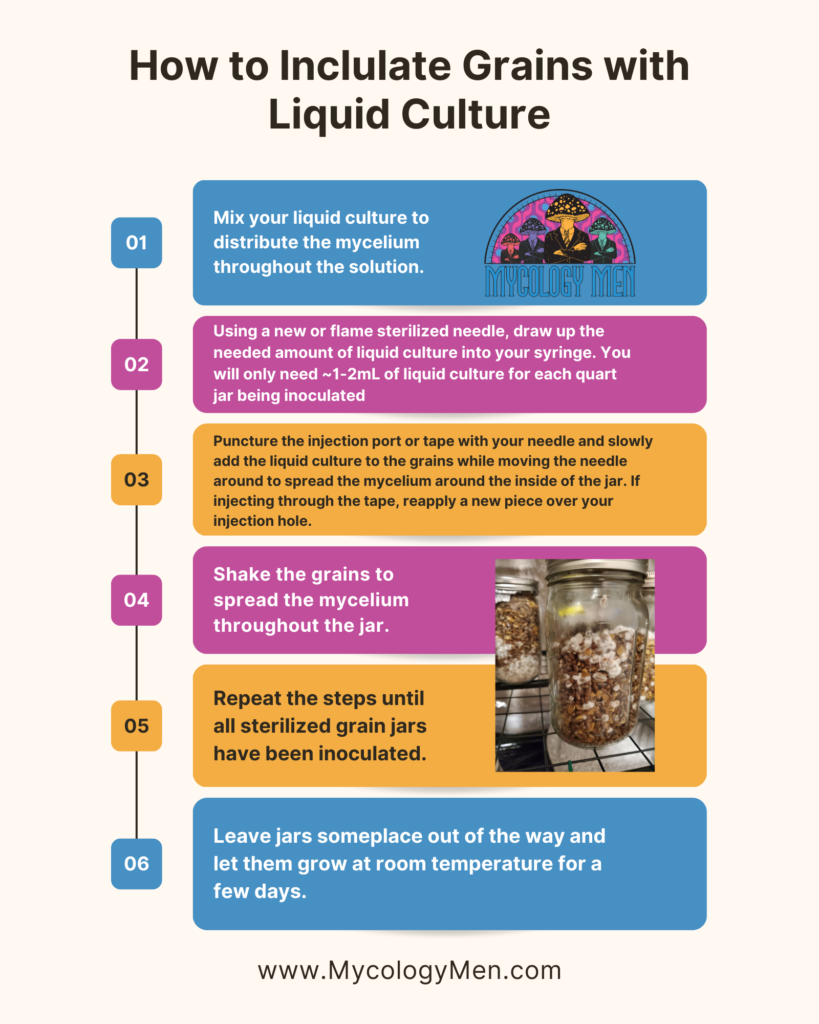
Once you have mycelium on agar plates or in liquid culture, you can create grain spawn. Grain spawn boosts the growth of your mycelium that will eventually be mixed with bulk substrate and will then fruit. The grains not only provide nutrition to your mycelium, but they also serve as a vehicle to evenly distribute the mycelium when moving to bulk substrate.
When choosing your grain, smaller is better. Each kernel of grain becomes a mycelial capsule, giving the mycelium a platform to further expand into the area around it. Popular grains are Rye, Wheat, Milo, and Wild Bird Seed. In this article we will cover everything you need to know about creating grain spawns, including the supplies needed and the procedure to follow. Let’s dive in on how to make grain spawn for mushrooms.
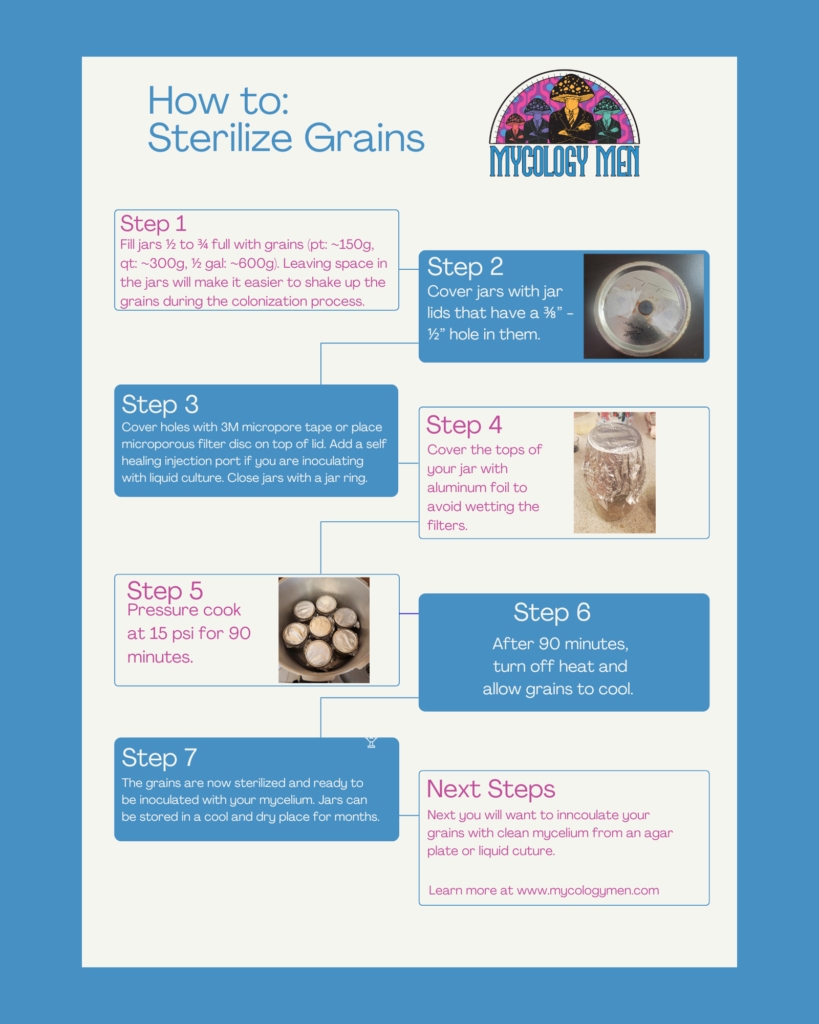
In order to sterilize grains you will need your grains, clean water, jars with lids that allow for sterile gas exchange, and a pressure cooker that reaches 15psi. You will also need a way to strain your grains and a clean, flat area to allow them to cool.
You may be limited by what grains are available to you in your area. When choosing what grain to use, a smaller kernel is preferred. Smaller kernels provide more points of inoculation per pound when it’s mixed into the next generation of grain or into substrate.
Make sure the jars you choose can fit into the pressure cooker that you will be using. Quart or ½ Gallon Mason jars are a good size for making grain spawn.
Jar lids should allow for sterile gas exchange in and out of the jar. You can make your own jar lids by punching at least one ⅜”-½” hole into the top of the jar lid and covering the holes using 3M Micropore Tape or a microporous filter disk. If you plan on using liquid culture to inoculate, adding a self healing injection port to your lid is a good idea.
Gypsum is not necessary but it can provide calcium and sulfur to the mycelium and helps keep the grains from clumping during sterilization.
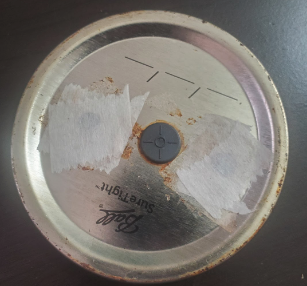
Mycelium on an agar plate or in liquid culture
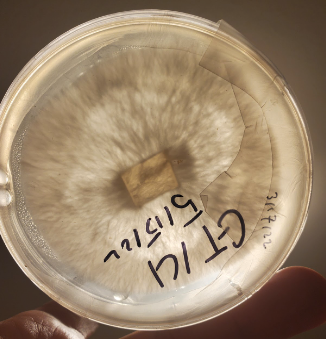
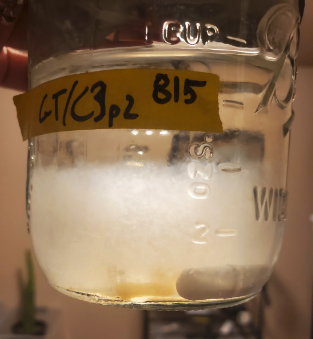
Mycelium on an agar plate (left) and in Liquid Culture (right) that is ready to be used to inoculate sterilized grains.
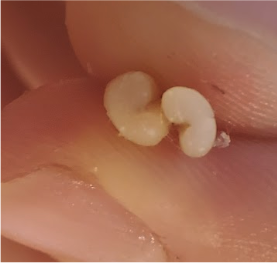
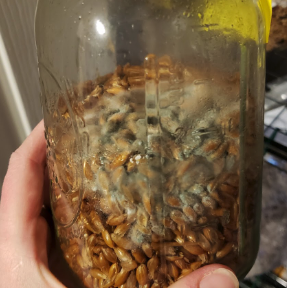
To make the nutrients available to the growing mycelium, the grains must be hydrated with water and boiled. Depending on the size of the jar, you will want to have a moisture content of 40-60%. As your jar size increases, the moisture decreases. Soak the grains overnight, and then bring to a boil and simmer for 10-20 minutes the next day.
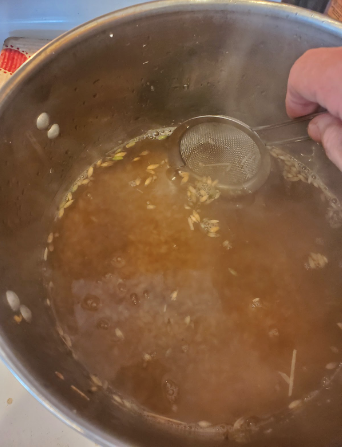
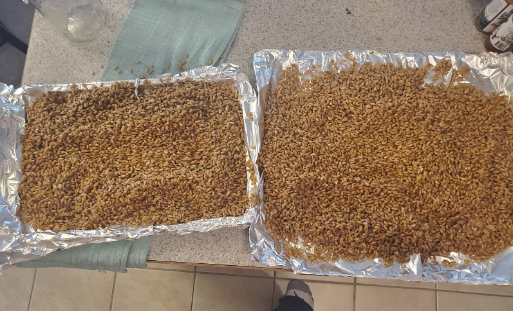
You can tell they are ready when the kernels are still intact, but you can easily squish them between your fingers. Once ready, strain your grains using a colander or a screen. Spread them out on a clean surface and let cool until grains stop steaming. Overcooking your grains will turn them to mush, decreasing gas exchange in those areas and making them more susceptible to contamination.

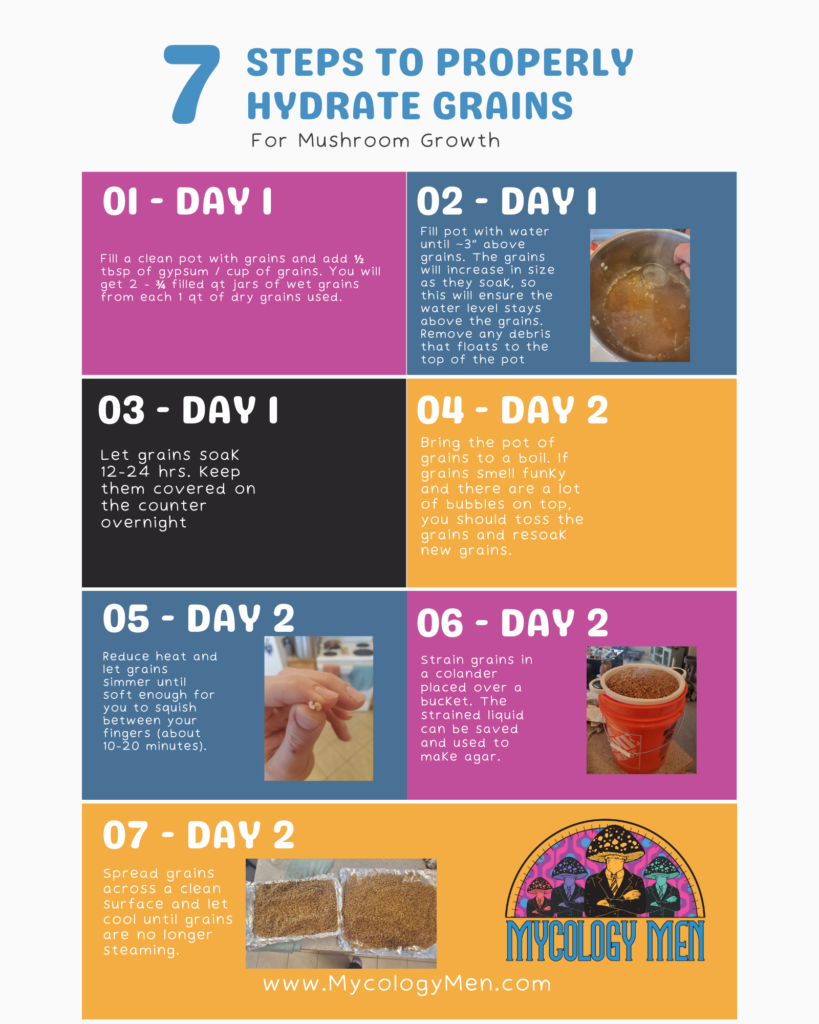
Another way to check if your grains are fully hydrated is to cut some kernels open and look to see if there are any white unhydrated parts. In Image A, the kernel has a lot of white, unhydrated area within it and needs to simmer for longer, but in Image B, the kernel is fully hydrated and the grains should be strained and allowed to cool.
4. Spread grains across a clean surface and let cool until grains are no longer steaming.
After your grains are hydrated, the next step is to fill your jars and sterilize. Only fill your jars ½ - ¾ full with grains so you can easily mix the grains by shaking. Place the filled jars into your pressure cooker and fill with enough water to last the entire sterilization process. Pressure cook at 15 psi for 90 minutes. After 90 minutes, turn off the stove and let cool for a few hours, or until the jars are safe to handle.
Inoculating Using Mycelium on Agar Plates
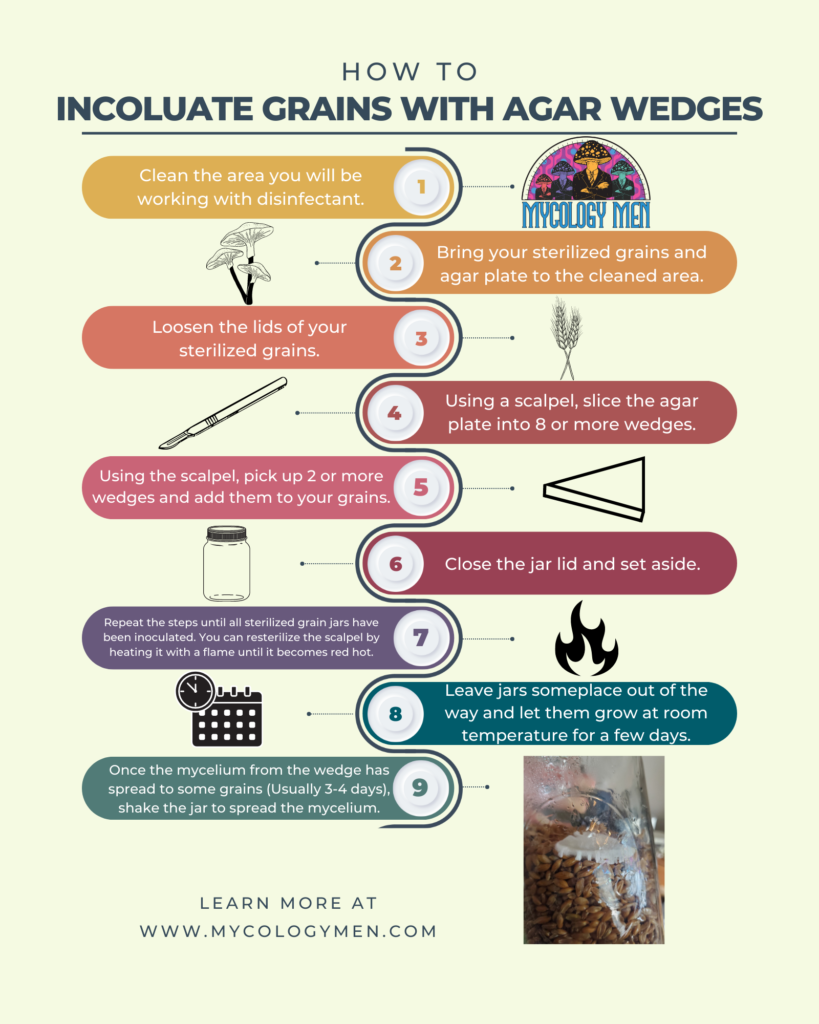
Once you have sterilized grains, the next step is to inoculate them with clean mycelium from an agar plate or liquid culture. Ideally, when choosing a plate to inoculate your grains, you’d like a plate that is less than 2 weeks old and has a ~½” uncolonized region on the edges to ensure no contaminants have recently fallen on the plate.
After choosing the plate, you want to work in the cleanest space you have available; this can be in a SAB or in front of a flow hood. Clean everything brought into your clean area with a cleaning solution, 70% isopropanol or ethanol.
Using a sterile scalpel, cut your agar plate into 8 or more wedges and then replace the cover. Loosen the jar lids so that you aren't struggling to open them when adding agar wedges. If working with a flow hood, place the jars closest to the filter so that they are upstream from where you are working with the agar plate.
Remove the lid of a jar and with a sterilized scalpel pick up 2 or more wedges and add them to the grains. Close the jar lid tight and shake so that the wedges spread throughout the grains. Repeat until all your jars are inoculated.
Inoculating using Mycelium in Liquid Culture
When inoculating with liquid culture it is best to have jar lids with self healing injection ports. Without a self healing injection port,you can inject through the micropore tape and cover the injection site with another piece of micropore tape.
You want to avoid adding too much to your grains because it will alter the moisture content of the jar and may make the grains too wet. 1-2mL of liquid culture is enough to fully colonize a quart jar.
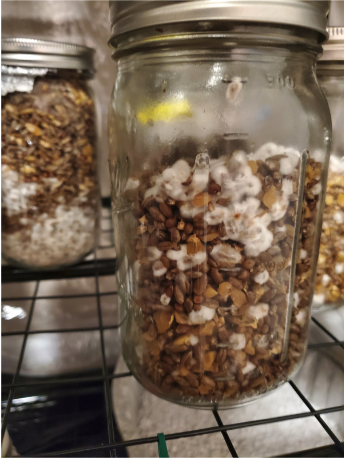
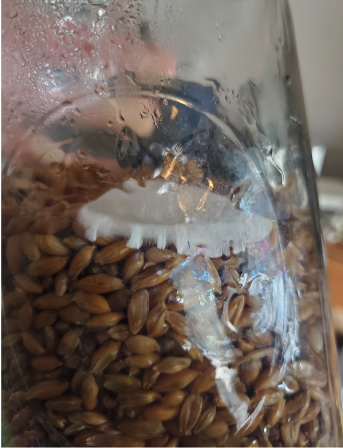
After inoculating your jars, set them on a shelf that is out of the way and leave them to grow. The ideal temperature for growth is 75°F, but most normal room temperatures will be fine. After 3 or so days, check the jar to make sure your mycelium is growing or for any contamination that may be growing, as well. You want to only see white growth on your grains. A common contaminant, trichoderma, will show up as green growth.
If your mycelium is growing and there is no contamination, leave the jars to continue colonizing. Keep checking up on your jars every couple days. When you see >30% of the jar is colonized, shake the jar to redistribute the mycelium. After shaking, place the jars back on the shelf and continue monitoring until the jar is fully colonized. If at ~75% the mycelium isn’t growing evenly, you can give the jars another shake to spread the mycelium around.
When they look fully colonized, I like to give them another 3-5 days to make sure the internal grains are covered with mycelium. After full colonization, it is time to either expand your mycelium onto more grains - 1 jar can be enough to expand into 10 new jars - or move the spawn into a bulk substrate.
4 Easy Steps How to Make Mushroom Compost
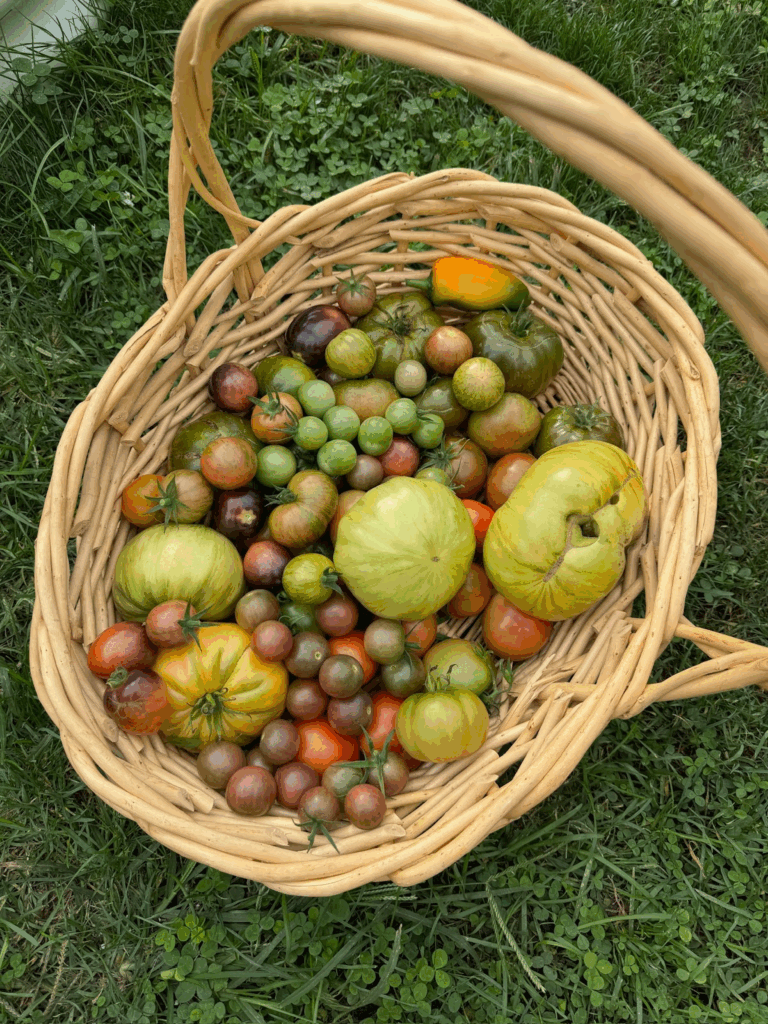
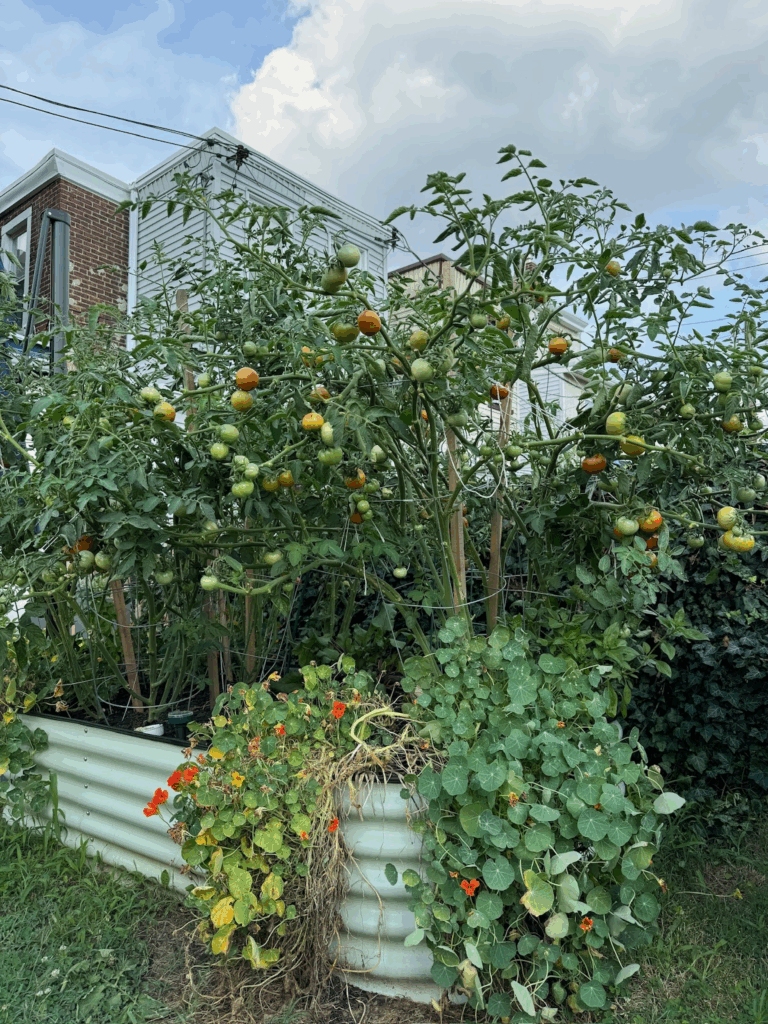
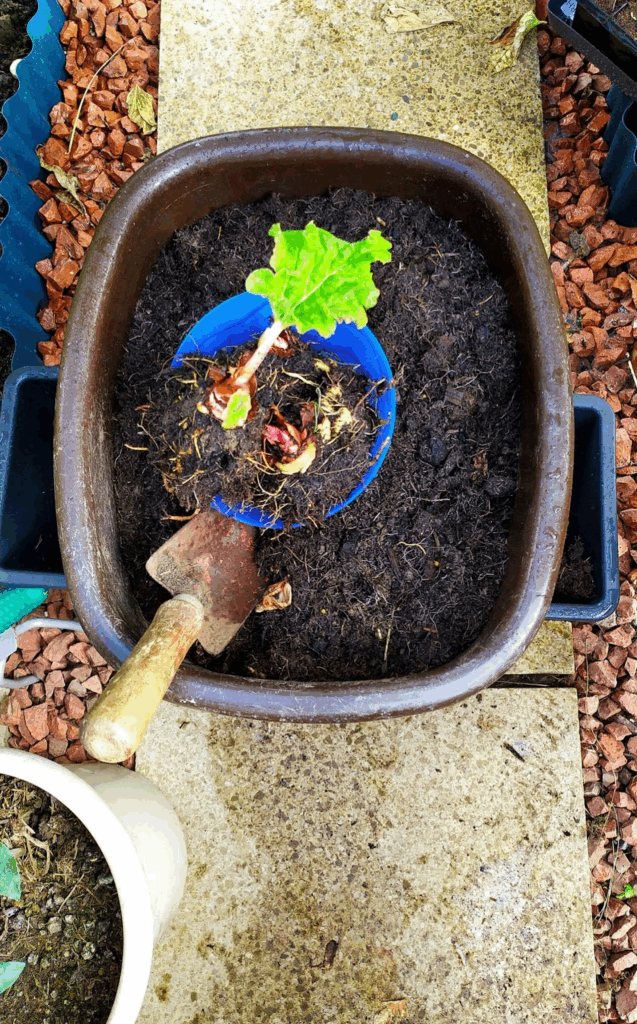
Mushrooms are the new wave of health and wellness routines. Mushroom coffee, mushroom tea, mushroom pill capsules. Mushrooms are everywhere! But, did you know that mushrooms can be majorly beneficial in your garden?? That’s right, mushroom compost can be used to provide nutrients, increase water retention, improve soil health, and even prevent diseases from harming your garden. Take a look at the picture below of my garden at home. We grow lots of vegetables (mainly tomatoes and peppers) and we use mushroom compost religiously. There has been an increase in production and we are battling less disease since we started using mushroom compost.

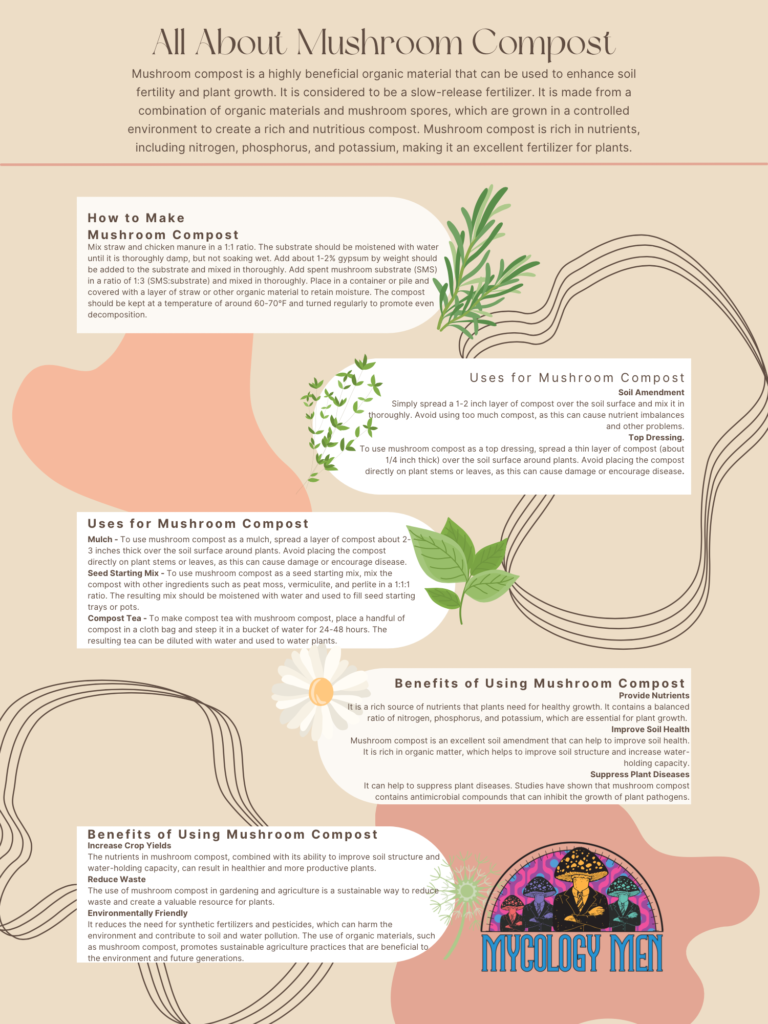
In this article we are going to tell you exactly how to make your very own mushroom compost. It’s not as hard as you may think! In addition, we are going to expand on the benefits of using mushroom compost . Let’s make your garden flourish!
It should be no surprise that mushroom compost is absolutely filled with nutrients that can benefit your garden. Nitrogen, phosphorus, and potassium are the big three. You need good levels of all three for a garden to flourish.
Soil-structure is an important quality to consider for your garden. Mushroom compost can help your soil retain water so your plants can drink enough. The texture of mushroom compost can also make it easier for plants to root and to uptake nutrients. Not only that, but the microorganisms in mushroom compost can break down organic matter and add even more nutrients to your garden.
Every garden is in a never ending war between beneficial and harmful microorganisms. They compete for resources. If you have a strong base of beneficial microorganisms, they can fight the harmful microorganisms so they don’t have a chance to grow and harm your garden.
The whole goal of utilizing mushroom compost is to help your plant flourish in a nutrient-rich environment. Healthy plants produce more. For a farmer that relies on high yields for income, you can see how this would be a major benefit.
Below you will read how to make mushroom compost, but here is a quick preview. It uses straw, manure, and spent mushroom substrate. All of these are substances which might get thrown away if you don’t use them to make mushroom compost.
Since your mushroom compost is doing all the hard work of pest control and nutrient-boosting, you don’t need to use fertilizers or pesticides in your garden. Fertilizers and pesticides can be harmful to the environment. Save the planet and use mushroom compost!
BE SURE TO READ ALL INSTRUCTIONS BEFORE STARTING YOUR PROJECT
To prepare the substrate for your mushroom compost, simply mix straw and chicken manure in a 1:1 ratio. It would be beneficial to plan ahead how much compost you will likely use for your gardening needs. This will inform you how much straw and chicken manure to use.
Once you have mixed those two together to create your substrate, wet the substrate with water. You want it to be damp all the way through, but not soaking wet. Too much moisture can lead to problems with the compost and eventually harm your garden instead of helping it.
Once your substrate is made and thoroughly damp, it is time to add 2% gypsum (by weight) to the mixture. This means if you have about 20 pounds of substrate, you need to add 0.4 pounds of gypsum. You can use this formula:
Weight of substrate x 0.02 = Weight of gypsum
Make sure to mix in the gypsum well so it is evenly distributed through the substrate.
Now it is time to add your spent mushroom substrate (SMS) to your brand new mushroom compost substrate. SMS is what is leftover after you have harvested a mushroom crop (you can grow your own mushrooms using liquid cultures or spawn plugs). SMS contains all the good stuff you want in your compost: spores and mycelium mainly. Combine the SMS with your compost in a 1:3 ratio. This means you should use ⅓ the amount of SMS as you have compost. Referring to our example before, 20 pounds of compost needs to be combined with 6.67 pounds of SMS. Mix it thoroughly then we can move onto the final step.


4. Let is Decompose
The final step is to let your newly made mushroom compost decompose. Place your mixture in a container or pile it up and cover it with straw. It needs to retain the moisture you added, so make sure to put a lid on the container or fully cover it with straw. Let that sit in 70F weather and mix it up regularly. Don’t forget to keep mixing the compost regularly to promote even decomposition. If you don’t mix it, it will not decompose evenly or at all. And even worse, it will probably smell terrible!
So, now that you’ve done all the work of making your mushroom compost, how do you know when it is ready to use? This is a great question because if you use the compost too soon, it can actually be harmful to your plants rather than help them. There are a few signs you can look for to determine if your compost is ready for use.
Firstly, it should be dark-brown or black and crumbly and soil-like. It should not look like straw anyone.
Secondly, check the smell. It should have an earthy smell. If it smells rotten or like manure then it needs more time to decompose.
While compost decomposes, it heats up dramatically. Temperatures can reach 170F! It is a good indicator that your compost is ready for use when it has cooled back to room temperature. It should stay at this temperature even after you mix it up. If you mix it up and it heats up again, that means it is not ready.
Ready-to-use compost should be a bit moist and break up easily. If it is very wet and clumps together, then it needs more time to decompose.
Don’t rush it. The decomposition process can take up to 6 months! Patience is key because if you use your compost before it is ready, it can harm your plants.
Once you feel the compost is finally ready, you can do a test to make completely sure. Plant a few seeds in a cup of compost and see if they germinate and sprout normally. If they don’t, that is a good indicator that your compost is not ready.
There are some common ways to utilize your mushroom compost to benefit your garden. The main goal is to introduce the nutrients from the compost into your soil to grow happy and healthy plants.
The most obvious way to use your compost is to simply mix it into the top layer of your soil. Use about a 2 inch layer of compost and thoroughly mix it into the soil. This will introduce nutrients to your soil and create an ideal environment for plants to grow.
You could also use mushroom compost as a thin top layer to your soil. About ½ inch thick. Just leave it sitting on top and the nutrients will slowly introduce themselves to the soil.
Some people choose to use their mushroom compost as a mulch substitute. Spread a thick layer (3 inch) over your soil. This can help with water retention, temperature regulation, and even suppress weeds. It is best practice to not place mushroom compost against plant stems as this can lead to unwanted effects like disease.
Using mushroom compost to start your seeds is a fantastic application! It is nutrient rich and can give the seeds a head start in life. Use a 1:1 ratio of soil and compost.
This may be the most unique use of mushroom compost we have seen. Basically, you want to introduce the nutrients from the mushroom compost into the water you use to hydrate your garden. Place a bit of mushroom compost in some cloth then soak it in water for about 2 days. Remove the cloth, add some more water, then go ahead and use your nutrient-rich compost tea to water your garden. Your plants will thank you!
Make sure to check out the rest of our blog for more mushroom growing tips!
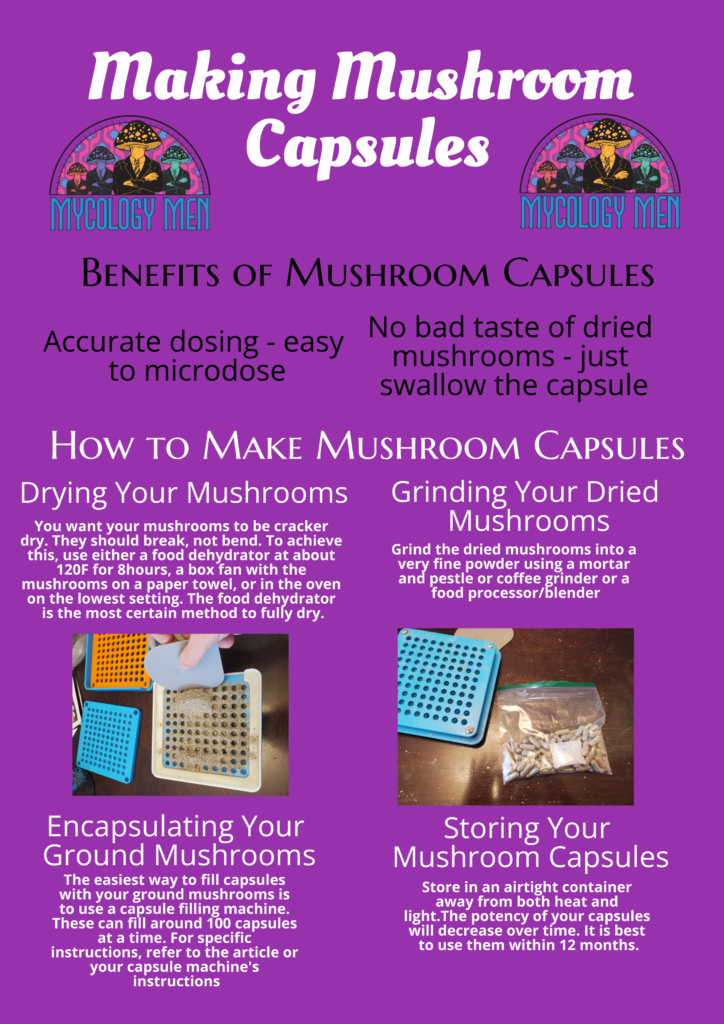
Once in capsules, controlling the dosage for microdosing is easy and ensures a consistent potency throughout the batch. You also avoid any bad taste when swallowing the capsules - no longer having to chew on dried mushrooms. Here is how to about about making mushroom capsules...
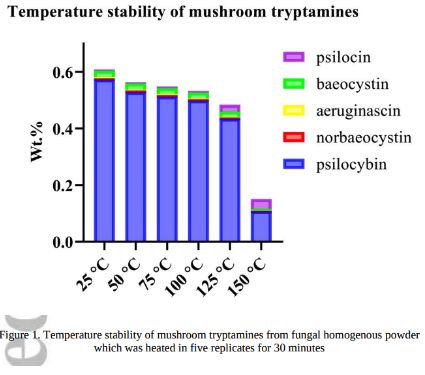
Before you can start making mushroom capsules you will need to dry and grind the mushrooms that you have. The goal of drying mushrooms is to remove all moisture from the fruit without breaking down any medicinal compounds. Prolonged exposure to light and high temperatures during the drying process can break down these medicinal compounds, like psilocybin and other tryptamine derivatives.. The chart below shows that drying at 77F (25C) is best, however, there is not a large decrease in the stability of tryptamines until the temperature goes above 212F (100C). For best results, keep the mushrooms in the dark as much as possible.
Food Dehydrator: (Our personal choice) Using a food dehydrator will dry the mushrooms using a combination of heat and airflow. We like to dry at ~120F (~50C) for 8hrs or longer until they are cracker dry. Cracker dry means the stems will not just bend, but will break when bent. If not fully dry, the mushrooms will not grind as well and will develop mold when stored. Drying time may vary depending on mushroom size. Slicing large mushrooms can decrease drying time.
Box Fan: Place mushrooms on a paper towel and point the fan to blow over the mushrooms. This method will take a lot longer since it will be drying at room temperature. You can run into the problem that as moisture evaporates, the mushrooms will be lighter and may be blown away during the drying time.
Oven: Set the oven to the lowest setting. Line a baking sheet with parchment paper and separate mushrooms a few centimeters apart. Place the sheet on the lowest rack in the oven. It is important to leave the oven door open so it doesn’t get too hot. Check periodically and take them out once fully dry to avoid keeping them in high heat for longer than is necessary.
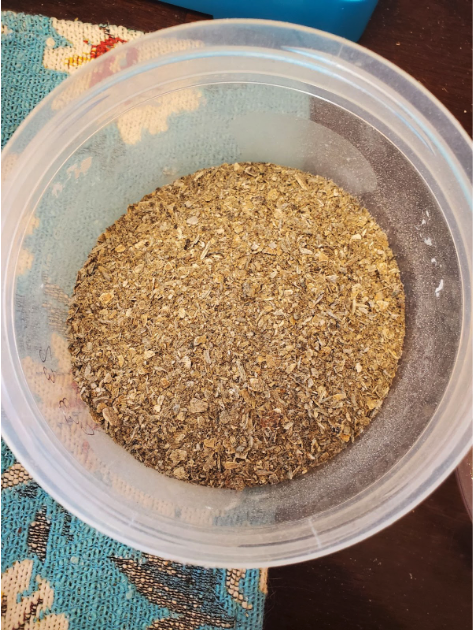
Once dried the mushrooms need to be ground. Mortar and pestle are the most basic way to grind. It takes some work to grind everything manually, and not ideal if you are grinding a lot of mushrooms. A coffee or spice grinder is the best option because it’s low cost and you can easily grind a lot of mushrooms. Food processors or blenders can also work, and most people already have them in their kitchen. No matter what option you choose, you want to get the mushrooms ground into a fine dust. This way, you can pack the capsules fully and more consistently.
We recommend getting a capsule filler for making mushroom capsules. These devices allow you to make a lot of capsules at once and give better consistency when it comes to the dose in each capsule. Before buying a capsule filler, you will have to decide what size capsules you want to make. For microdosing, we recommend using size 0 or 00; they will hold up to 600mg and 900mg respectively when fully packed.
If you don't have a capsule filler, you will have to fill the capsules by hand. To do this, repeatedly press the longer capsule bottom into the loose mushroom powder until it is full. Then take a tamping tool and press the powder into the capsule tube. Repeat this enough times to completely fill the capsule with tamped mushroom powder. You then press the capsule top until you hear or feel a click.
Here is a step by step protocol of how we make our capsules using a 100 hole “00” size capsule filler. This process for making mushroom capsules, however, should be the same for most capsules fillers on the market. You can refer to Figure 1. below for a visual aid.
3. Put the Spill Guard over the Body Plate containing the bodies of the capsules, and pour the powder over them. Use the Powder Spreader to fill all the capsules.
4. Use the Pressing Plate to tamp down the powder in the capsules.
5. Repeat pouring powder and tamping until the capsules are full.
Everything You Need to Know About Foraging Wild Mushrooms
(Without Poisoning Yourself!)
Foraging Tips, Tools, Recipes, & More
Warning
Certain types of mushrooms found in the wild can be highly poisonous and even DEADLY. Never consume a mushroom you have found in the wild without being able to 100% identify it. Always play it safe! If you are unsure, ask an expert. It is not dangerous to touch a poisonous mushroom but it can be fatal if ingested.
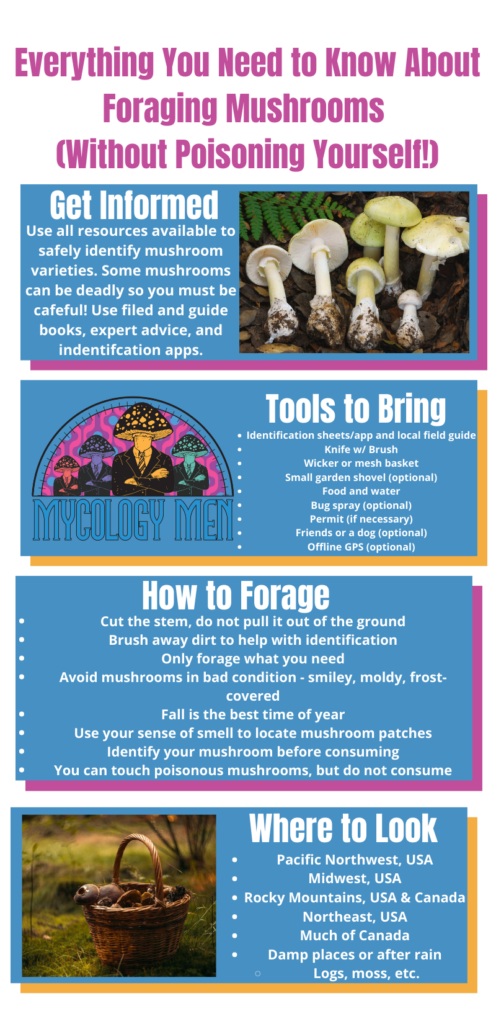
The more you know and the more resources available to you, the better. There are many, many, many varieties of mushroom out there. You probably cannot memorize them all and even if you could, do you want to risk making a mistake with a poisonous (and possibly deadly) mushroom variety? Resources like your local field guide, mushroom identification sheets, and identification apps on your phone can help you to stay informed on the types of mushrooms you are foraging. This can make the whole experience more exciting and safe.
If you are ever unsure of a variety of mushroom, it is always a good idea to take a picture and ask an expert. If you do not personally know an expert, you can try reaching out to your local mushroom foraging group leaders. You can also post pictures in identification apps and users can help you to identify the mushroom. Never take the chance of consuming a mushroom you have not been able to accurately identify.
Resources Summary
Just as with any adventure, you want to make sure that you have all the proper tools to keep you safe and allow you to make the absolute best of the adventure. Resource tools like field guides and identification sheets and apps are very important, but there are other tools you should be using to forage for mushrooms. Mesh or wicker baskets are essential to both carrying your foraged mushrooms and aiding repopulation. The mesh allows mushroom spores to fall from your foraged mushrooms and onto the ground. These spores will eventually produce a new batch of mushrooms. And so the cycle continues.
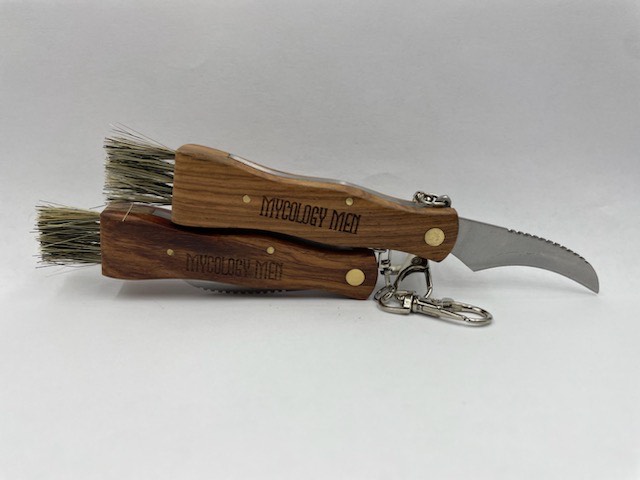
To collect your mushrooms, a knife and brush (or combination tool) are absolutely necessary. Sometimes you might even use a small garden shovel to remove larger mushrooms. The small shovel is optional for foraging.
Items for your well-being should also be packed for any outing of foraging wild mushrooms. Water to stay hydrated and food to keep up your energy are both great to bring along. Bug spray can also be very useful when deep in the woods and surrounded by the bugs and insects that come with the territory.
In some areas you may need a permit to forage for mushrooms. If so, be sure to carry this with you. You can check with park directors and employees for specifics. It is not OK to forage on private property without the owner's permission. Some national parks also do not allow the removal of any plant life; so foraging would also not be allowed.
Foraging wild mushrooms is always fun with a companion like a good friend, a group, or even a dog. Not only can it be fun to forage with others, but it can help to keep you both safe. Many times you will find yourself foraging off-trail in the forest. If some injury were to occur, having a companion can help you get back to safety or alert someone to help you.
An extremely useful, but optional tool, would be an offline GPS instrument. When you have no signal, the GPS on your phone becomes useless. An offline GPS instrument can help you in the unfortunate event you get lost in the woods.
Essential Tools Summary
Generally, you will find mushrooms in the wild in both fields and forests, most commonly after rain. You can also look in specifically damp places like under logs or in moss. There are many parts of the United States and Canada where you can find mushrooms to forage.
The most popular area is the Pacific Northwest of the United States (PNW). The PNW has great weather conditions for mushrooms to flourish in the wild. You can also forage for mushrooms around the Rocky Mountains, the Midwest, the Northeast, and lots of Canadian territories.
We suggest getting a copy of your local field guide for more specific information on mushroom hunting in your area. An important note to remember is that many National Parks do not allow the removal of any wildlife, so be sure to check local laws and restrictions.
Where to Forage Summary
When you come across a mushroom you want to forage, it is best to use your knife to cut the mushroom at the stem rather than pull it out of the ground, roots and all. Many mushrooms will return year-after-year if you leave the roots be. So mark your spot and keep coming back! You can use your brush to remove any dirt on the mushroom. Some mushrooms hide in the dirt. This can help you to properly identify it as well as cook it.
Responsible mushroom hunters will only forage what they need. Over-foraging can be detrimental to the sustainability of the wild mushroom ecosystem. We advise avoiding mushrooms in bad condition as they will probably not be suitable for consumption. If the mushroom has mold, dark spots, wrinkles, or has frost on it, let it be. Frost will occur during the winter.
The best time of year to forage for mushrooms is the Fall. The weather conditions in the Fall are ideal for the mushrooms to be fully grown and ready to be collected. Any later than the Fall and the weather becomes cold enough to freeze and expand the water in the mushrooms (mushrooms are mostly made of water).
Aside from looking in areas where mushrooms are commonly found like under logs or in moss, you can use your sense of smell to locate mushroom patches. They give off a distinct odor and if you are familiar with it, you can follow your nose right to the pot of gold at the end of the mushroom rainbow.
Be sure to properly identify any mushroom you find before consuming it. Touching the mushrooms is fine in any situation, even if they are poisonous.
How to Forage Summary
Unfortunately there is no single way to positively tell the difference between an edible mushroom and a poisonous (and possibly deadly) one. Some edible mushrooms look similar to poisonous ones and vice versa.
Before consuming any mushroom you forage in the wild, be sure you can 100% identify the mushroom. It is always better to play it safe and not consume the mushroom. You could be messing with life and death. Two great tips to follow are: 1) always avoid mushrooms with red caps or stems & 2) White gills often mean poison.
Not all mushrooms are edible, some are even poisonous. Of the over 10,000 varieties of mushrooms on this planet, only about 30 are edible. This means it is absolutely essential to be informed about the types of mushrooms you are foraging wild mushrooms. Carrying an identification sheet or application with you can help keep you safe. Here is a quick list of mushrooms you can both forage and eat. We give a quick description of each as well.
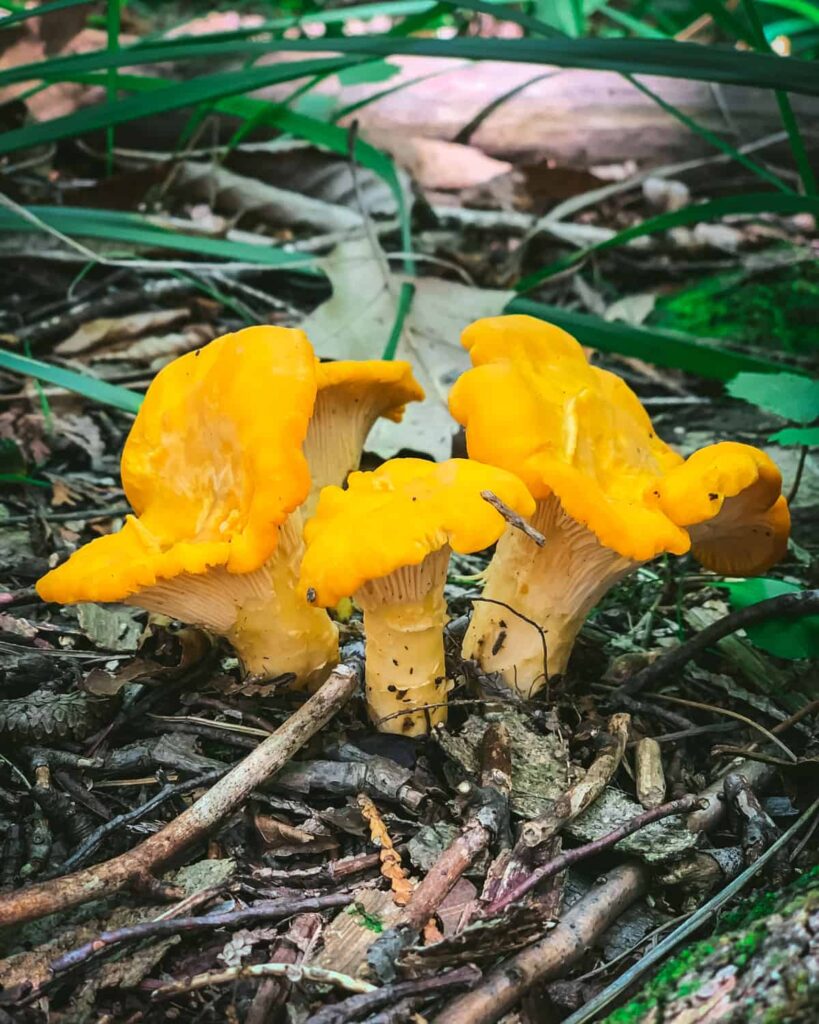
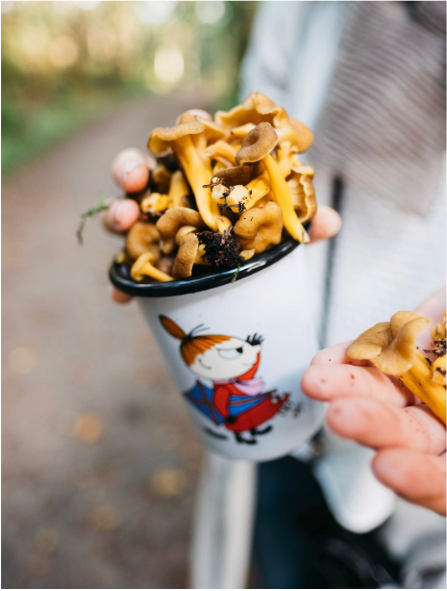
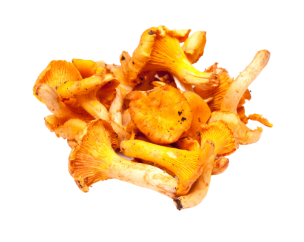
Chanterelles are some of the most sought after mushrooms because they are easy to find and identify and delicious to cook with. Chanterelles are bright yellow, orange, or gold. You can commonly find them under oak trees when the leaves have fallen.
But be careful. If you find mushrooms growing on wood on the ground, they are not chanterelles but likely they’re poisonous look-alikes.
The best way to confirm it is a chanterelle in the field is to check the gills and see if they are false or true. Chanterelles have false gills which means, while the ridges look like gills, they are not.
True gills are entirely separated from each other rather than folds in the surface like false gills are. Another good indicator is the smell. Chanterelles smell like apricots.
If you find one chanterelle, keep on looking. You will most likely find more as they tend to grow in clusters!
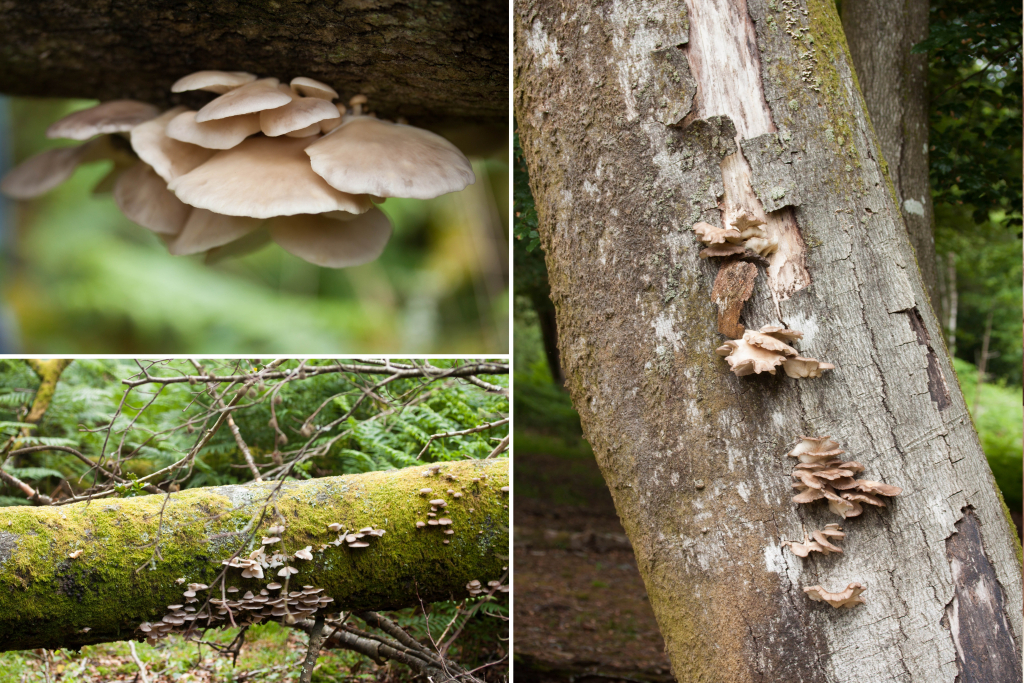
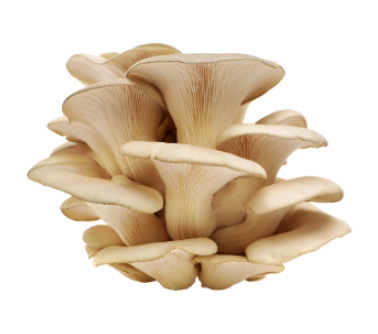
Oyster mushrooms are another relatively easy mushroom variety to find and identify. They are white or a light brown/pink. If you come across a yellow oyster-looking mushroom, it is probably one of the poisonous look-alikes found in the USA. It is best to avoid yellow oyster-looking mushrooms.
You can find oyster mushrooms on dead or dying tree logs. The underside of a downed log is a good place to check as oyster mushrooms enjoy the shade. The best way to confirm the mushroom you found is an oyster is to inspect the gills and stem.
The gills should be white and the stem should be off-center. Another good indicator is the growing pattern. Oyster mushrooms grow in groups.
Unlike other types of mushrooms, oyster mushrooms grow pretty much year-round. You are more likely to find them after heavy rainfall. It is best to pick the young oyster mushrooms as these will have a better taste and are not yet spreading spores like the older oyster mushrooms. Spreading spores is essential to the sustainability of the mushroom ecosystem.
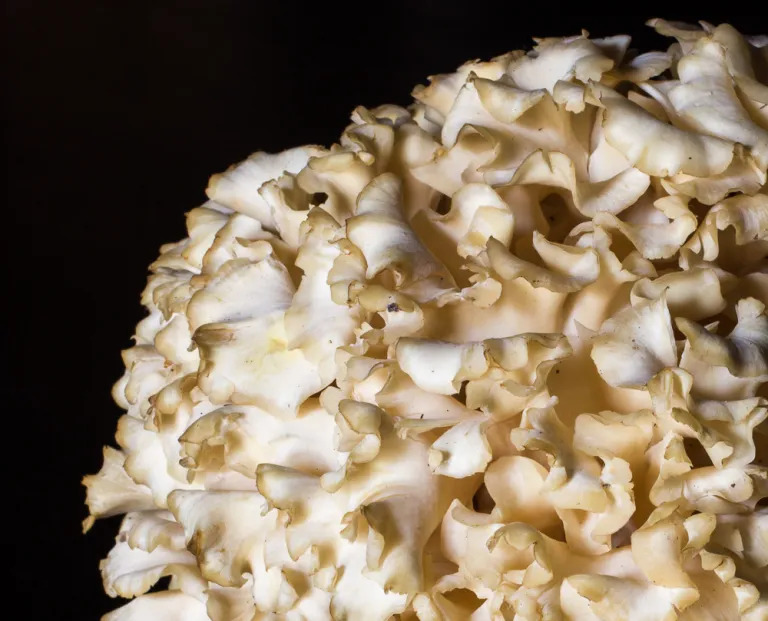
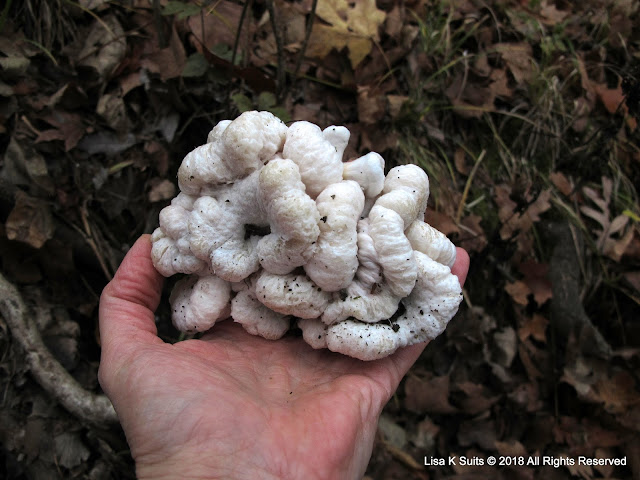
Cauliflower Mushrooms are some of the most difficult mushrooms to find in the wild, but they provide a delicious reward once you do find them! They resemble a ball of wavy noodles or a head of cauliflower. You can usually find them at the base of dying trees. They have a firm texture with a lot of flavor. Definitely a chef’s favorite.
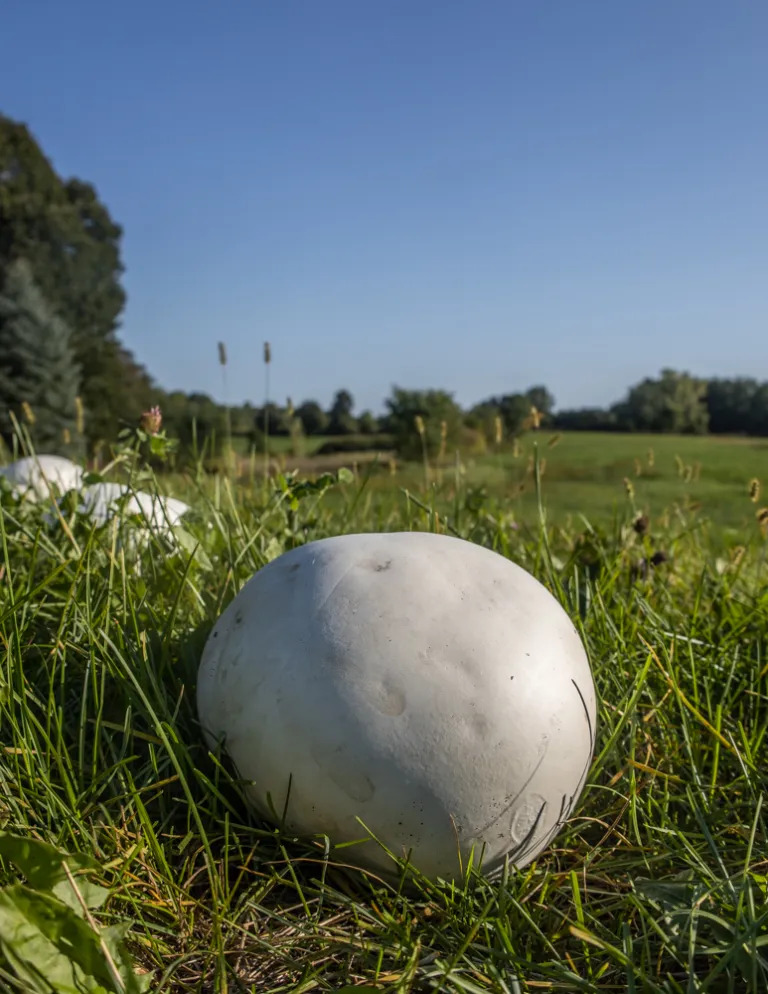
Puffball Mushrooms are pretty easy to pick out because they are relatively large round balls, about 4 to 12 inches or even more! They can be found in meadows, fields, or forests. There are many varieties of Puffball Mushroom so it is important to check with an identification tool or an expert before consuming. Some varieties are not edible.
There are other varieties of mushroom that look like puffballs and they are poisonous. Be VERY CAREFUL when identifying mushrooms before consuming. If you find an edible puffball, cut it in half to make sure the consistency is the same throughout. This means it has not gone bad and is ready to be cooked! Puffball mushrooms have an earthy flavor.
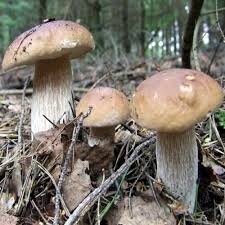
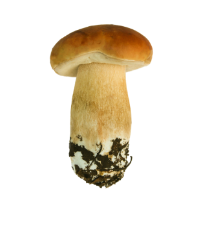
Porcini mushrooms are some of the hardest mushrooms to find in the wild. That, along with their rich, earthy flavor, make them highly desirable (and a bit pricey)! Luckily for us foragers, the porcini mushroom is pretty easy to identify.
They have a thick, sturdy, white stem and a brown, spongey cap. Young porcini mushrooms (about 4-6 inches in height) are the best to harvest because they are less likely to have pest infestation. You will most likely find porcinis on the forest floor.
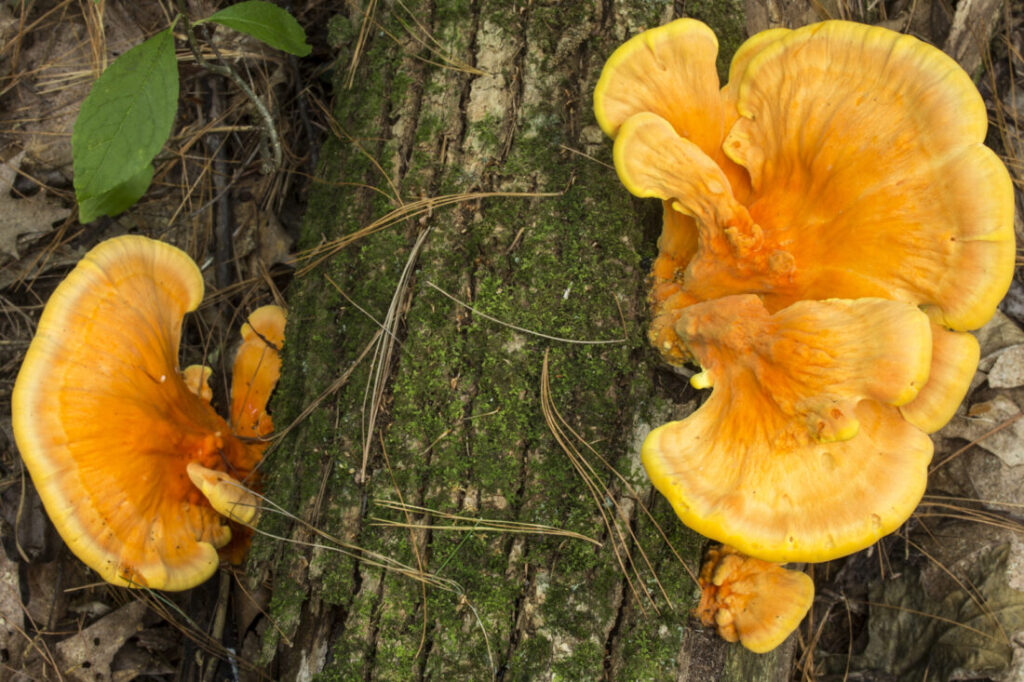
Chicken of the Woods are a highly sought after variety of mushroom because their flavor is quite desirable. As you might have guessed, they have a chicken flavor. These mushrooms are relatively easy to find and identify because of their bright orange/red color, they grow on trees at eye level, and do not have gills. Young chicken of the woods mushrooms will be moist and older ones might be a bit more crumbly.
Shrimp of the Woods mushrooms are great for beginner foragers because they do not have any poisonous look-alikes. When you find them, you can be pretty confident they are the real deal.
They are also a fun mushroom to hunt for because they are usually pretty covered with dirt and hiding under rotted wood. They will definitely require some cleaning before consuming.
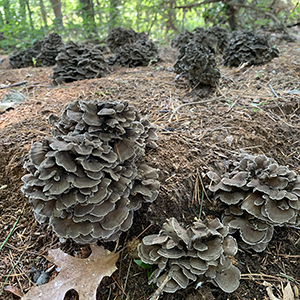
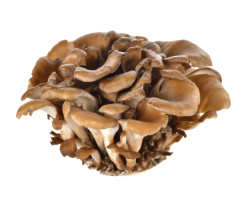
Maitake is translated to “dancing mushroom” in Japanese. It is called this because people would literally dance upon finding one. They are highly desirable and can grow quite large. Some find maitake mushrooms weighing over 30 pounds! Now that is a big mushroom. These mushrooms are sought out for their medicinal properties.
In addition, they are a great source of protein and can be a delicious replacement for meat in any meal. You can identify them by their overlapping, dark brown fronds, their large size, and the area they grow. You will find maitake mushrooms at the base of dying oak trees.
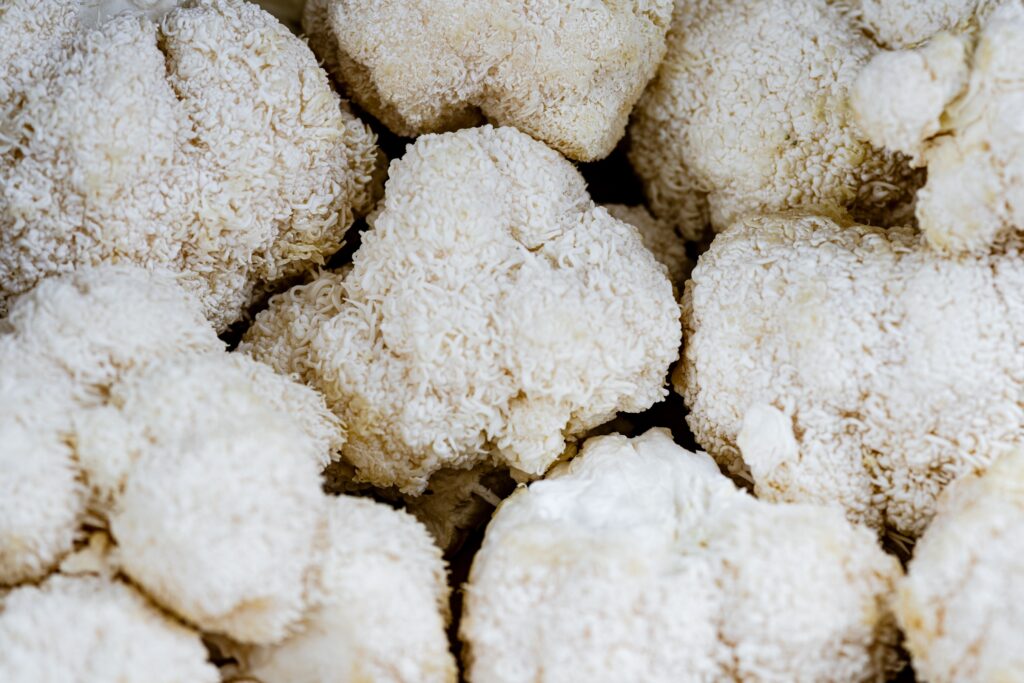
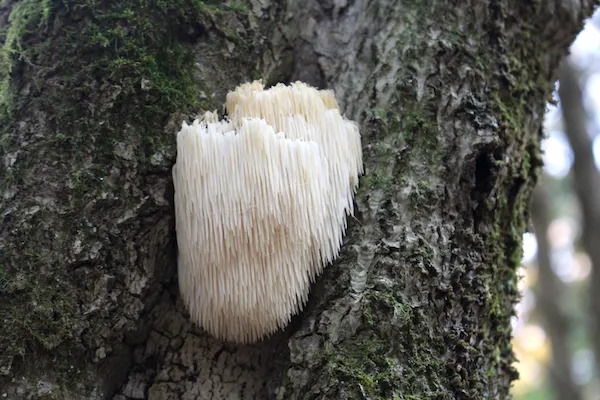
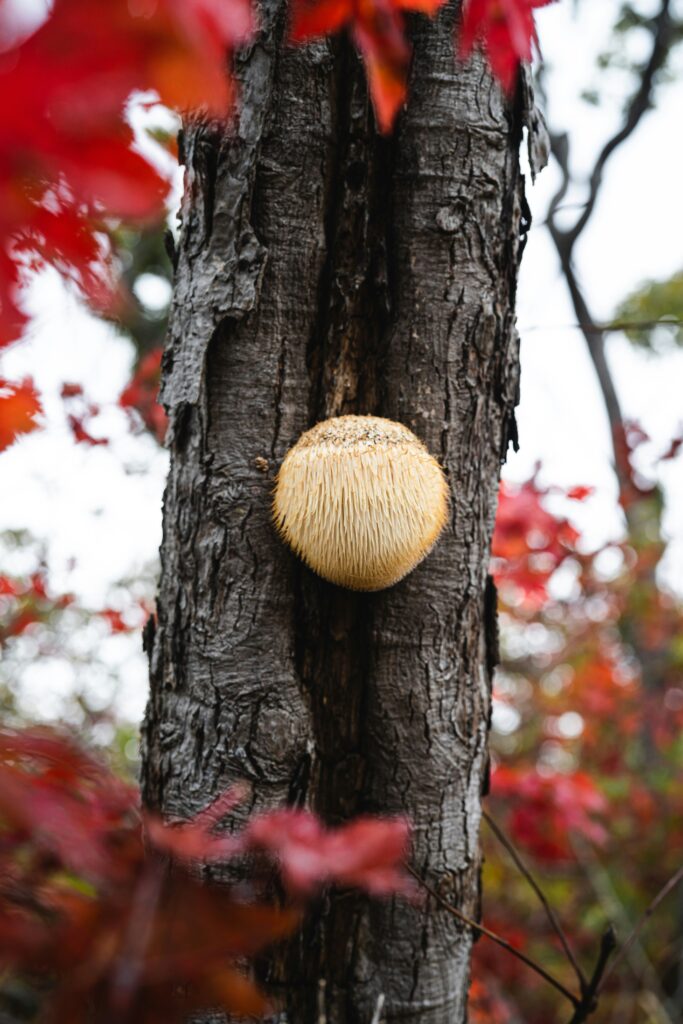
Lion’s Mane are one of the most revered mushroom varieties for both foragers and chefs. They can fetch a hefty price tag, but many find it very worth it. They are known as one of the best tasting and most medicinal mushroom varieties out there. They do not look like typical mushrooms with a stem and cap. Rather, they look like white waterfall spikes that flow over whatever object they sit upon.
They are sometimes even called “pom-pom” mushrooms because of their resemblance to a cheerleader’s pom-poms. These mushrooms can grow on broken and dying logs and trees, but you might need a ladder to reach them. Luckily for foragers, there are no look-alikes and all forms of the Lion’s Mane are edible.
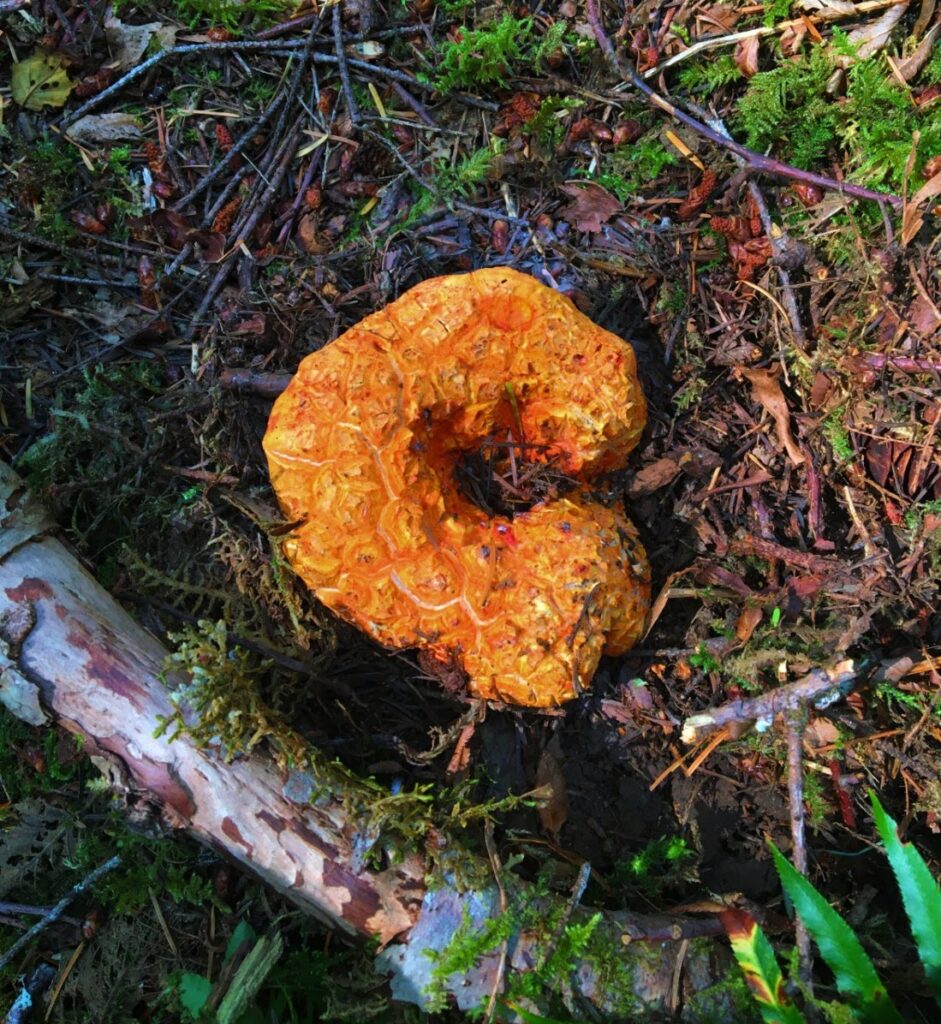
Lobster mushrooms are not even technically mushrooms. But you can still forage and cook with them! Lobster mushrooms occur when a parasitic fungus takes-over an edible mushroom and changes its consistency, shape, flavor, and even its DNA.
They take the shape of the mushroom they take-over, so the shape can vary greatly. You can spot lobster mushrooms from their bright red color and hard exterior shell, like a lobster. Look for these mushrooms on the forest floor.
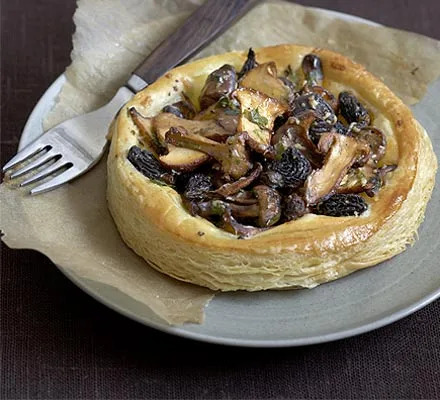
Foraged Mushroom Recipes
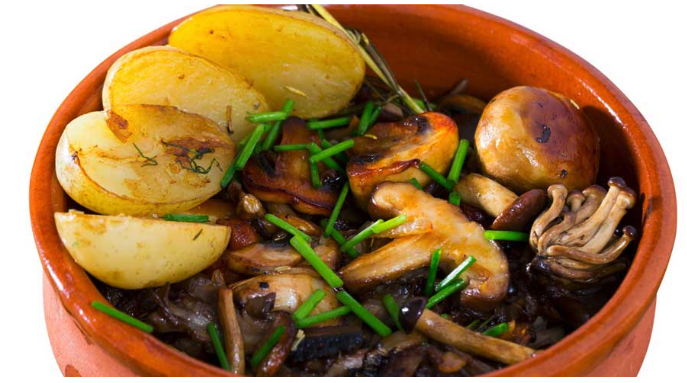
Sautéed mushrooms can make a really delicious and nutritious addition to make proteins. Mushroom-topped burgers. Steak with a mushroom side. Tuna and pork with mushrooms. To sautée mushrooms, heat butter in a pan over medium-high heat.
Place your mushrooms in the butter and cook until the desired consistency is reached. How long this process takes will depend on the mushroom’s size, consistency, and type. You can add anything you want to the sautée like onions or garlic or seasonings.
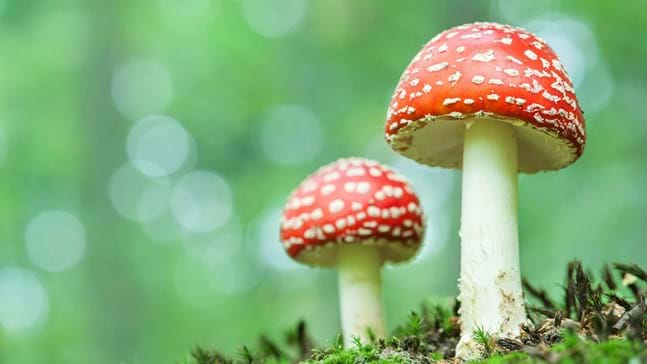
Fly Agaric mushrooms look like the typically animated mushrooms you see in cartoons. The red cap with white dots is very noticeable. These mushrooms are not fatal by poison to humans, but could be for dogs and cats. Ingesting these mushrooms can cause intense nausea, loss of coordination, sleep, and, on occasion, hallucinations.
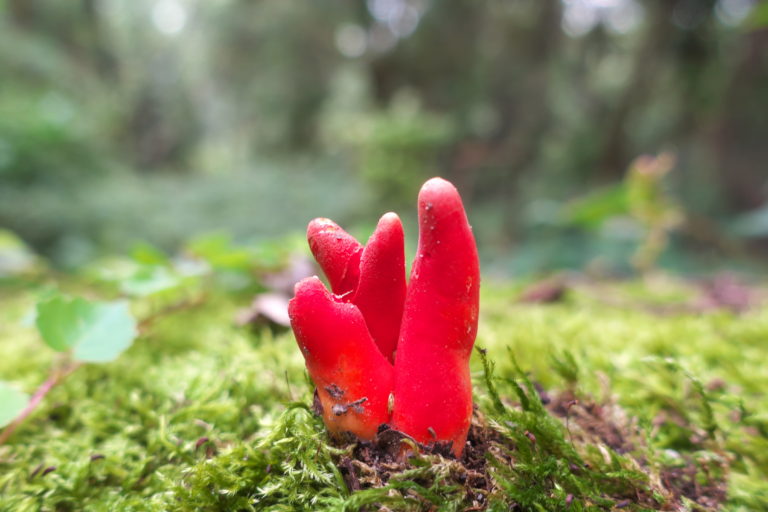
These bright red mushrooms are pretty rare, but, if ingested, can cause death within days. Death is caused by multiple organ failure, but you may also experience hair loss, skin peeling, low blood pressure, and stomach pain. They look similar to a type of edible mushroom called ganoderma. Podostroma Cornu-Damae are found in Asia, specifically Japan and Korea.

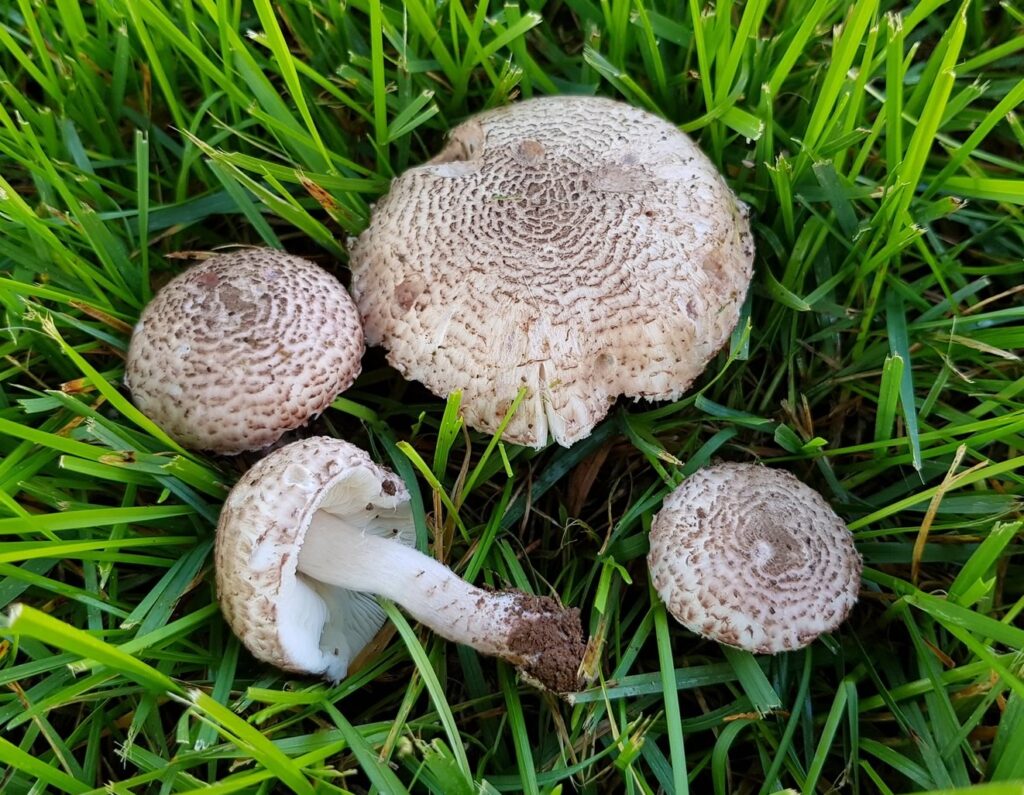
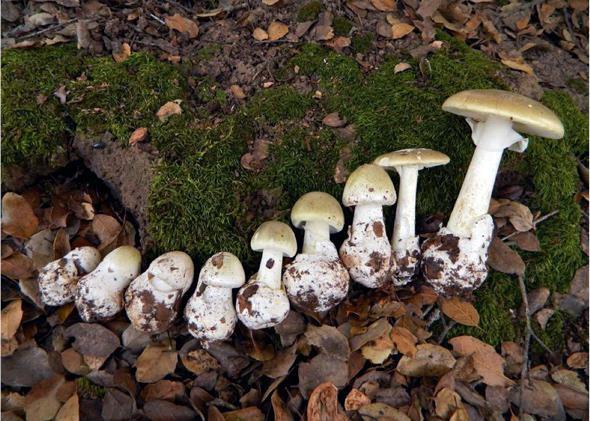
Destroying Angels are the most commonly found toxic mushroom found in the world. They cause kidney and liver failure which is fatal. If ingested, you will experience severe stomach cramps, diarrhea, and convulsions within 3 hours. They are sometimes called “Fool's Mushrooms” because the all white and oval mushrooms look like certain types of edible mushrooms.
The name of these mushrooms can speak for itself. Ingestion can be fatal due to liver toxicity. These mushrooms can be found all over Europe, Asia, and North America. Like other poisonous mushrooms, these resemble certain types of edible mushrooms.
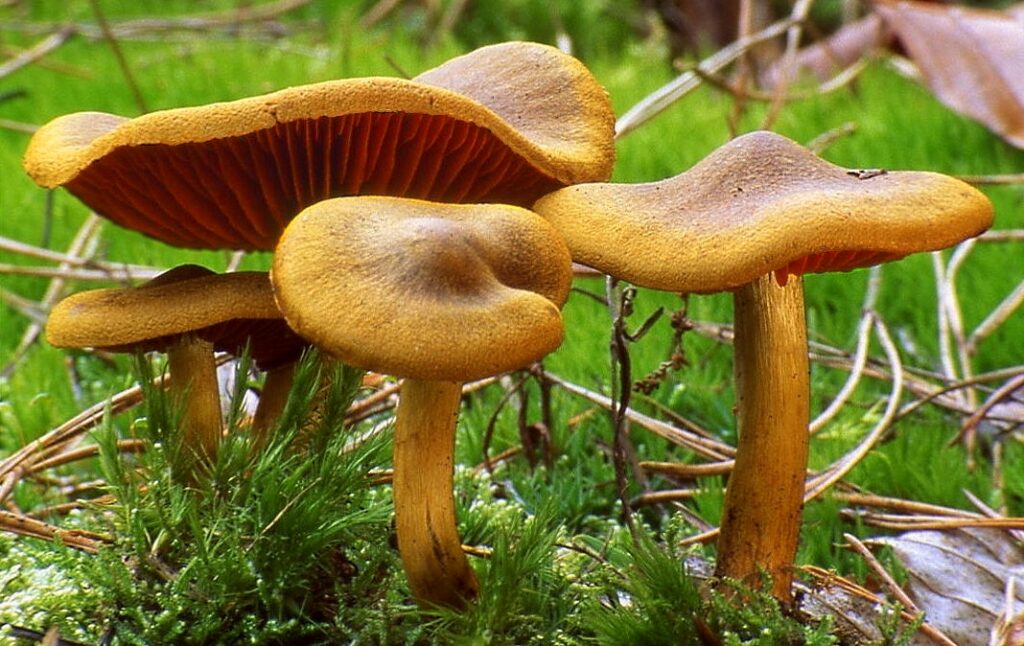
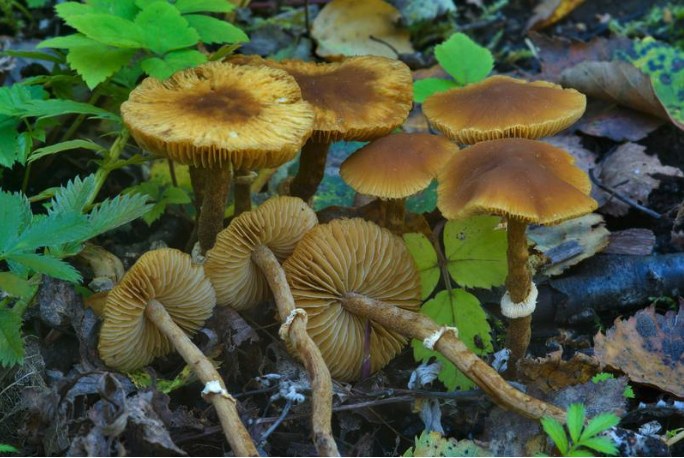
Webcaps can resemble chanterelles, an edible mushroom variety. Unlike chanterelles, Webcaps can be fatal. They can cause flu-like symptoms which might not appear for up to 3 weeks after ingestion.
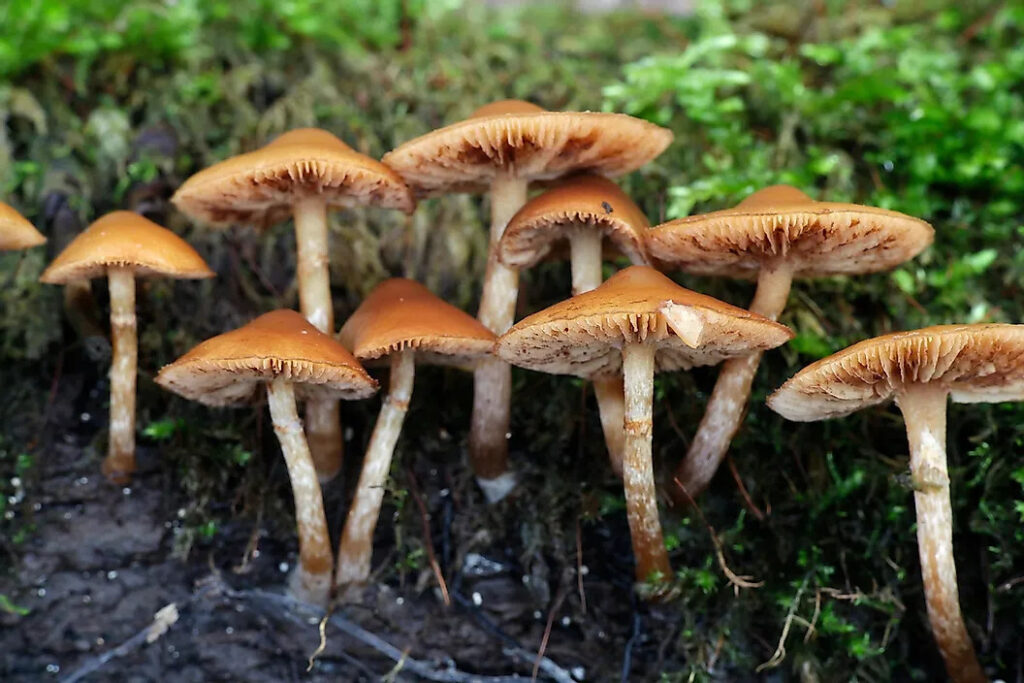
Autumn Skullcaps, if ingested, can cause liver failure which results in death within 7 days. Symptoms include diarrhea, vomiting, and hypothermia.Like other types of poisonous mushrooms, these resemble other types of edible mushrooms and can be easily misidentified.
Death Caps, as you might have guessed, are known as the deadliest mushroom in the wild. Just a small amount can be fatal. Ingestion can lead to nausea, vomiting, dehydration, dizziness, and more. These mushrooms resemble other types of edible mushrooms so one must be careful when identifying.
These mushrooms can commonly be found in the wet lawns of the American Pacific Northwest (PNW). They can be misidentified as magic mushrooms, but they will not cause any hallucinations. Instead they can cause liver and kidney failure. Symptoms may resemble food poisoning which can lead to misdiagnosis.
Check out the rest of our blog for great guides!
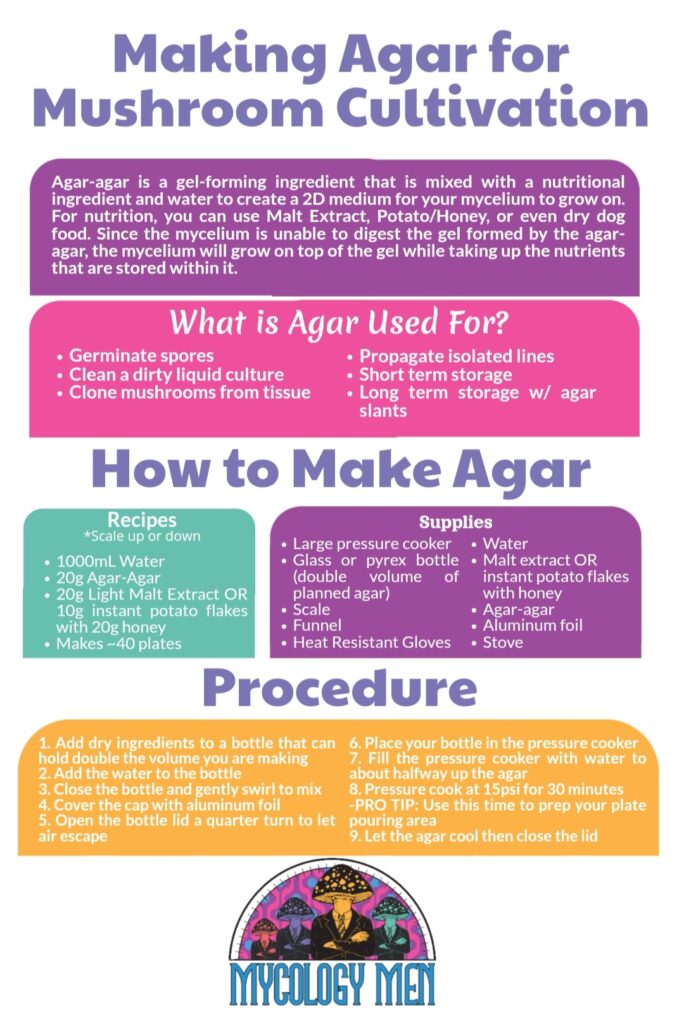
Agar-agar is a gel-forming ingredient that is mixed with a nutritional ingredient and water to create a 2D medium for your mycelium to grow on. There are many different ingredients that can be used as nutrition in agar; some of the most common recipes include Malt Extract, Potato/Honey, or even dry dog food.
Since the mycelium is unable to digest the gel formed by the agar-agar, the mycelium will grow on top of the gel while taking up the nutrients that are stored within it. This characteristic makes agar plates very useful in mushroom cultivation.
Agar plates can be used to germinate spores from a Multispore Syringe, clean up a dirty liquid culture, clone mushrooms from living tissue, and propagate specific lines you’ve isolated. They also serve as a short-term storage solution, since you can store mycelium on agar plates in the fridge for months. For a long-term storage solution, you can use your agar to make agar slants.
An agar slant is agar cooled in a test tube at an angle, providing a sloped surface for the mycelium to grow on. The small amount of air in the tube and the narrow opening combine to reduce the chances of your agar drying out or becoming contaminated over time. Agar slants have been known to contain viable mycelium even after years of storage in a fridge.
Now let's dive into how to make agar at home...
Before you start making agar, you want to plan on creating a clean area to pour the agar. After sterilization, it is extremely important to maintain sterility to avoid contamination. Contamination occurs when bacteria, molds, or other microorganisms come into contact with your agar and use the available nutrition to grow and multiply.
The presence of contamination on your plates will make it very difficult to move your mycelium onto grains or into Liquid Culture. Contaminants can be transferred to your agar either by touching it directly with a dirty tool or by floating in the air and settling on your plate.
To avoid directly transferring contaminants onto your agar make sure to wash your hands before doing any sterile work and clean any tools that will come into contact with your agar. This won’t be a problem while pouring, however, once you start transferring mycelium from plate to plate it will be important.
An easy way to quickly sterilize a tool, such as a scalpel or syringe tip, is to heat it over a flame until it becomes red hot. You can also clean tools using 70% Ethanol or 70% Isopropanol, but be careful using these solutions around any flame.
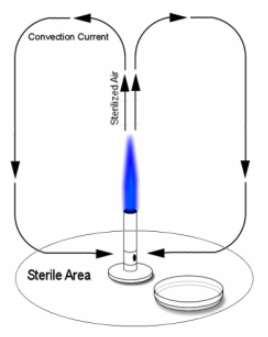
Avoiding contaminants from the air is harder to do than just cleaning tools. When trying to overcome this problem, the main goal is to prevent microorganisms in the air from coming into contact with your agar. Three ways to minimize contamination are working in a Still Air Box (SAB), pouring around a bunsen burner, or in front of a laminar flow hood.
A SAB creates an area you can work in that minimizes the amount of air moving around your workspace, a bunsen burner uses the updraft of the flame to create a small sterile area under the flame, and a laminar flow hood uses a fan and HEPA filter to clean the air before blowing it over your workspace.
Below are two agar recipes that I have had success with. Keep in mind that there are many other recipes out there, but any recipe will work with this protocol. All recipes can be scaled up or down depending on the volume you need, and each plate should be filled with 20-25mL of agar.
| Water | 1000 mL | 250 mL |
| Agar Agar | 20 g | 5 g |
| Light Malt Extract | 20 g | 5 g |
| # of Plates | ~40 | ~10 |
| Water | 1000 mL | 250 mL |
| Agar Agar | 20 g | 5 g |
| Instant potato flakes | 10 g | 2.5 g |
| Honey | 20 g | 5 g |
| # of Plates | ~40 | ~10 |
1. Add dry ingredients to the bottle.
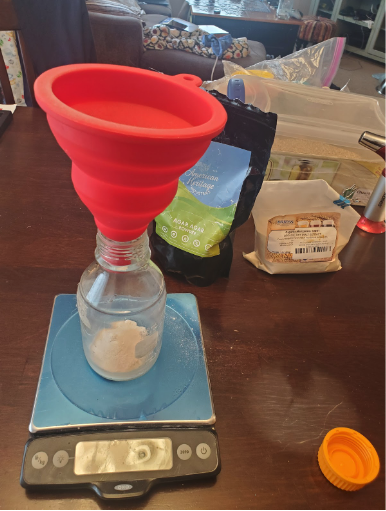
2. Add the water to the bottle.
3. Close the bottle and swirl to mix ingredients.
4. Cover cap with aluminum foil.

5. Open the lid of the bottle a quarter turn to let air escape during sterilization.
6. Place the bottle in a pressure cooker making sure it is secure and will not fall over.

7. Pressure cook at 15 psi for 30 minutes.
8. Let agar cool until it can be handled safely. Fully close the lid.
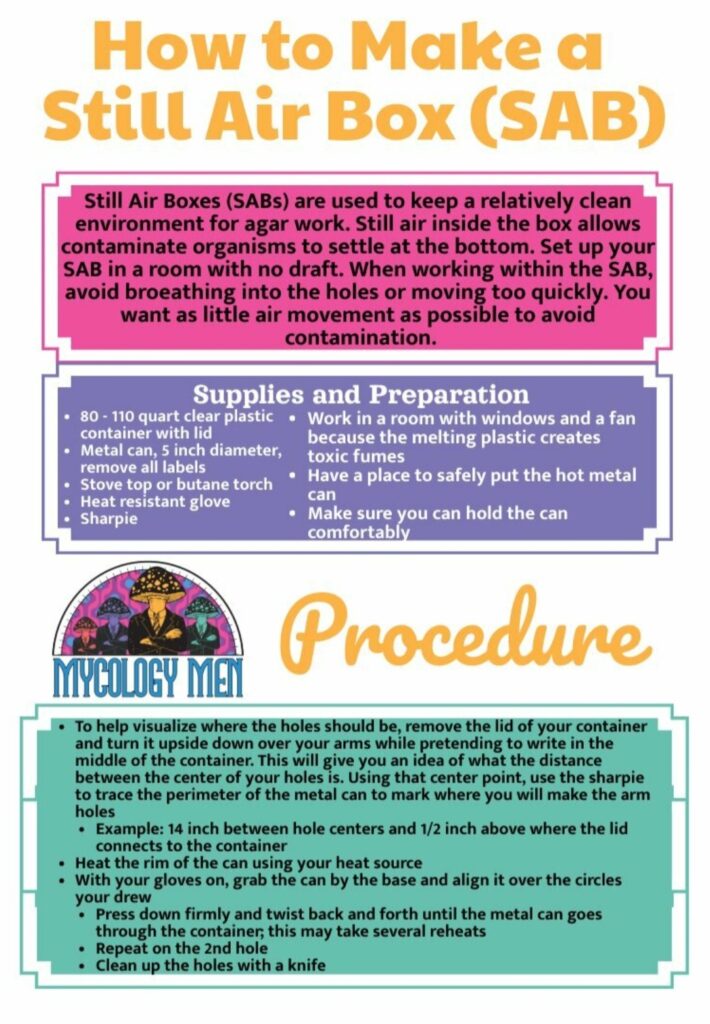
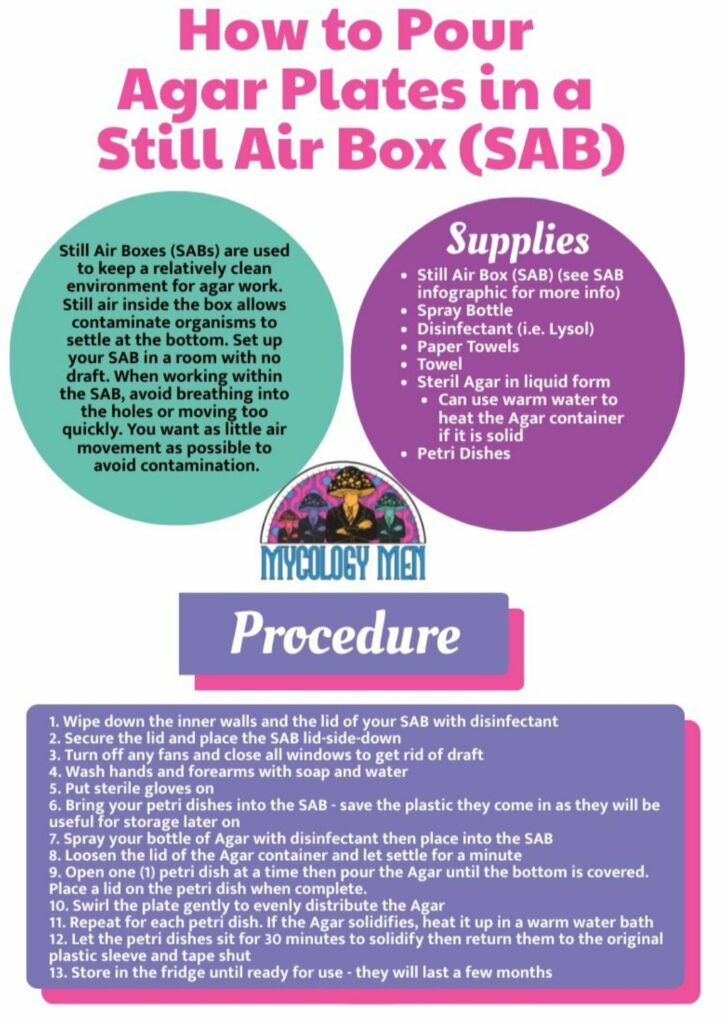
A SAB is a convenient and cheap way to create a relatively clean area to do agar work. It is made by cutting holes in a large storage container so you can stick your hands in and work within it. The idea behind a SAB is that if the air in the box is not moving, the organisms floating within the container will settle to the bottom.
After a few minutes, you will be able to work in clean air within the box. Keeping the air within the container as still as possible is the most important thing when using a SAB. When choosing where you are going to work, make sure it is not a drafty area and turn off any fans running in the room.
Besides setting up in a draft free area, the most important thing to focus on is minimizing the effect you have on the still air. Your breathing can cause air to flow into the SAB, so avoid breathing directly into the holes and wear a mask, if possible.
Moving your hands within the SAB will cause air movement and may bring in some outside air; move slowly and deliberately while working. Also be aware not to move your arms or hands directly above any open agar or grains.
We are constantly shedding contaminants from our skin that may drop down and settle on your plate. Being aware of your movements while working is an important skill to develop in any aseptic technique.
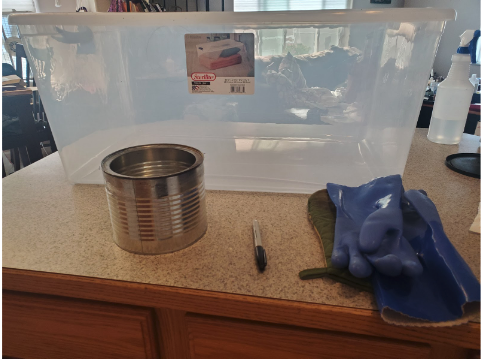
First, you must prepare to safely make the arm holes. You will have a very hot metal can, so you must be able to comfortably hold it and move it with the gloves you are using. Ensure you also have a place to let the container cool.
Putting it in a sink or laying it on some towels are some options that have worked for me. The melting plastic from making the holes will create toxic fumes, so I recommend opening windows and turning on nearby fans to get some air flowing.
Before heating anything up, you should mark where the arm holes will go. You will need to comfortably put both of your arms in the SAB and manipulate items near the center of the work space. To help visualize where the holes should be, remove the lid of your container and turn it upside down over your arms while pretending to write in the middle of the container.
This will give you an idea of what the distance between the center of your holes is. Using that center point, trace the perimeter of the metal can to mark where you will make the arm holes. I made my SAB with 9” between the edges of the holes and 1/2” above where the lid meets the container.
1. Once your holes are marked, set your container on a table with the marked holes facing up.

2. Heat up the rim of the can.
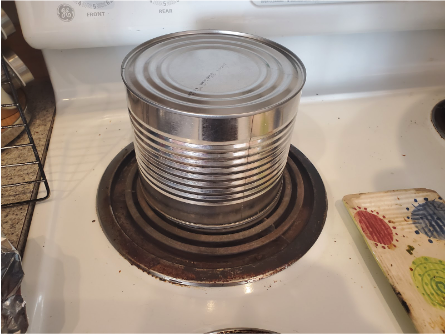
3. Once hot enough, use your gloves to grab the can from the base. Place the rim over your marked holes.
4. Gently push down on the can and slightly twist back and forth until it goes through the wall of the container. (You might have to reheat the can multiple times and repeat this process until it’s fully through.)

5. Pull the can out of the container and set down on your cooling area.
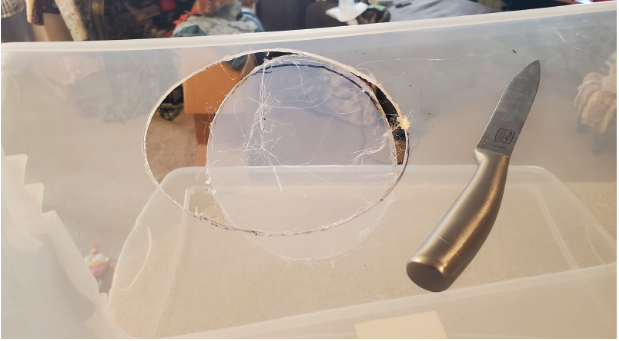
6. After cooling, remove any plastic that is stuck to the can and then repeat the process to make the second hole.


With a hot enough flame, a bunsen burner creates a sterile field about 12” around it. As the air is heated it rises and creates an updraft that pushes microorganisms floating around the flame upward and away from the area underneath it. As you're working under the flame, you will want to minimize any movements that disrupt these air currents.
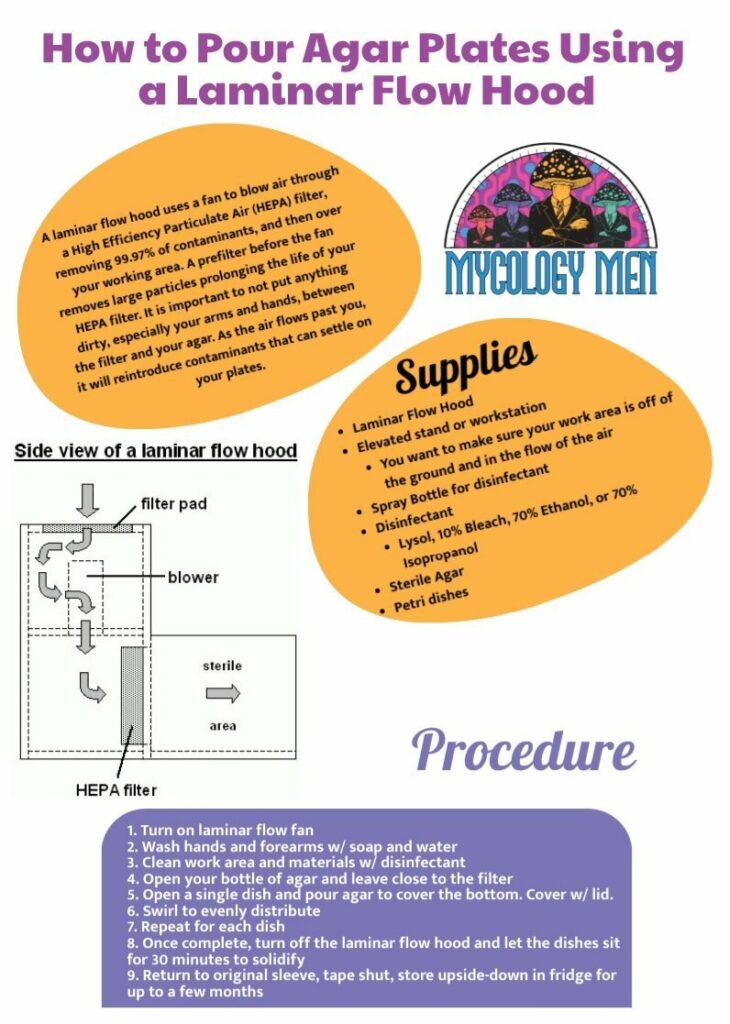
A laminar flow hood uses a fan to blow air through a High Efficiency Particulate Air (HEPA) filter, removing 99.97% of contaminants, and then over your working area. A prefilter before the fan removes large particles prolonging the life of your HEPA filter. It is important to not put anything dirty, especially your arms and hands, between the filter and your agar. As the air flows past you, it will reintroduce contaminants that can settle on your plates.
Eager to learn more about growing mushrooms? Make sure to check out our blog for more guides!
Adding some mushrooms to your diet and wellness routine can have a majorly positive impact on your wellness journey. Mushrooms have been shown to leave you feeling more full than meat does. This means less calorie intake. Substituting red meat for mushrooms or adding some mushrooms to your meat blend can be a great way to aid weight loss. We will go over this and other benefits of adding mushrooms to your diet. We will also discuss different types of mushrooms, some delicious recipes you can easily make yourself, and where to find high-quality mushrooms either at the store, in nature, or in your own grow set up!
If you are still wondering, "do mushrooms help you lose weight?", let's dive into how they can help!...
Obesity can be caused by a number of factors including high food ingestion, a lack of physical activity, and your family genetics.It can lead to health issues such as diabetes, cardiovascular disease, pulmonary diseases, and more. The imbalance between energy intake and expenditure create metabolic issues that lead to obesity.* This is a global issue. It is estimated that 40$ of men and women over the age of 18 are overweight. These numbers are increasing every year.
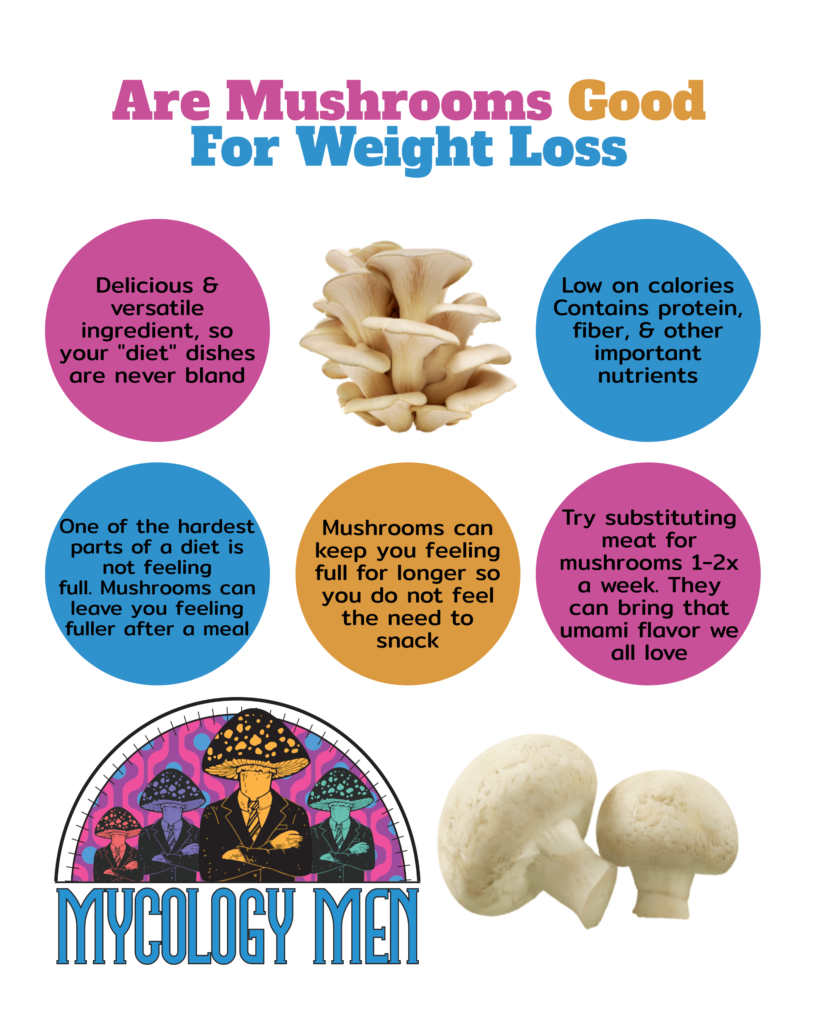
Adding mushrooms to your diet can have some excellent weight loss benefits. In addition to physical activity, eating well can help you both mentally and physically. Good mental health can aid your weightloss journey. Mushrooms are a delicious and healthy option to aid weight loss. They are low on calories and contain protein, fiber, and important nutrients. Consuming mushrooms can decrease obesity because of these bioactive compounds.* You may be wondering, “are mushrooms a fruit or vegetable”? They are neither! Technically, mushrooms are fungi. Delicious fungi.
One of the main issues with diets is that the dieter becomes bored with the meals. Maybe they do not even enjoy the taste of diet meals. Mushrooms can be cooked in many ways and used in a wide variety of dishes. Substituting meat for mushrooms, even just one or two times a week, can have major weight loss benefits. Mushrooms can bring the umami flavor to a dish that ensures it is delicious.*
Maybe the worst part of a diet is the feeling of not being full after a meal. It makes the diet hard to follow through to its completion. Mushrooms have been shown to not only make you feel more full, but they can also help with appetite suppression.*,* This means that less food can make you feel full and keep you feeling full for longer.


If you do not like the taste or texture of mushrooms in your food but you still want the benefits, you can easily buy or make mushroom capsules. Take these capsules like you would pills. There are many mushroom capsule/pill options available at your local health store.
You can also make your own mushroom capsules pretty easily. To do this, you just need some dry mushrooms, something to grind them up like a mortar and pestle, and a capsule filling kit. First, get some quality mushrooms. Read about where to find high quality mushrooms in the section below. Second, make sure your mushrooms are dry. It can be helpful to use a dehydrator for this step. Third, use a mortar and pestle or other grinder to grinder the mushrooms into a fine powder. Lastly, use a capsule filling kit to fill capsules with your freshly ground mushroom powder.
You can find quality mushrooms at your local grocery store or farmers market. Many chefs prefer loose mushrooms rather than packaged groups. In this way you can inspect each mushroom for freshness and bruising.
Mushrooms certainly grow in nature and you can find them all around! The trick is knowing which mushroom is which and being careful not to pick poisonous ones. There are many good mushroom guides available online which can help you identify different species. When in doubt, get someone with specific mushroom knowledge’s advice before consuming any unknown mushrooms. It could be deadly.
Growing mushrooms in your own home is not as hard as you may think! There are many blogs available on MycologyMen.com that can guide you on your journey. Mycology Men also can provide you with the equipment necessary.