As the headline says, always test your liquid cultures on agar before using them! This can save you a lot of time and energy from using a contaminated liquid culture. Why waste a perfectly good batch of grains just to grow bacteria that has beaten your mycelium in the resource battle?
Liquid cultures are known as “blind mediums” meaning it is really hard or impossible to tell if your liquid culture is contaminated with the naked eye. Bacteria can be too small to see and mold can remain dormant until it is injected into grains.
In fact, it is very common to have at least some bacterial or mold contamination in a liquid culture. But the real question is, who will win the resource battle: the mycelium or the contaminate?
Some people suggest that a cloudy liquid culture is a sign of contamination, but it is not as black and white as that. As we just mentioned, sure your liquid culture might have some contamination, but it can still grow perfectly fine as long as the mycelium wins the resource battle.
If you are at all concerned that your liquid culture is contaminated, the agar will reveal any serious contamination issues plain as day. Once you have identified contaminants, you can then proceed to save your liquid culture. We will discuss the steps to do so further along in this article.
Here is a short list of materials you will need to test your liquid culture on agar. Each of the items in this list are pretty necessary to successfully test your liquid culture. In mycology, it is best not to cut corners. Contamination is always lurking and a tricky beast to avoid unless you have the right tools.
Materials Needed to Test for a Contaminated Liquid Culture on Agar:
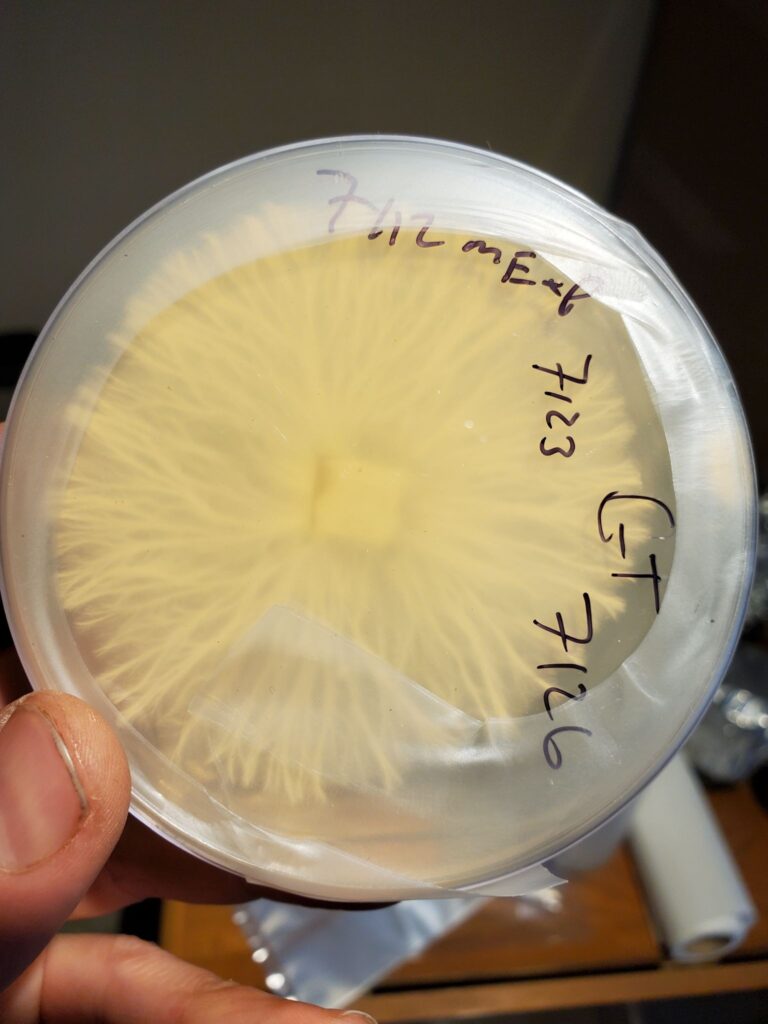
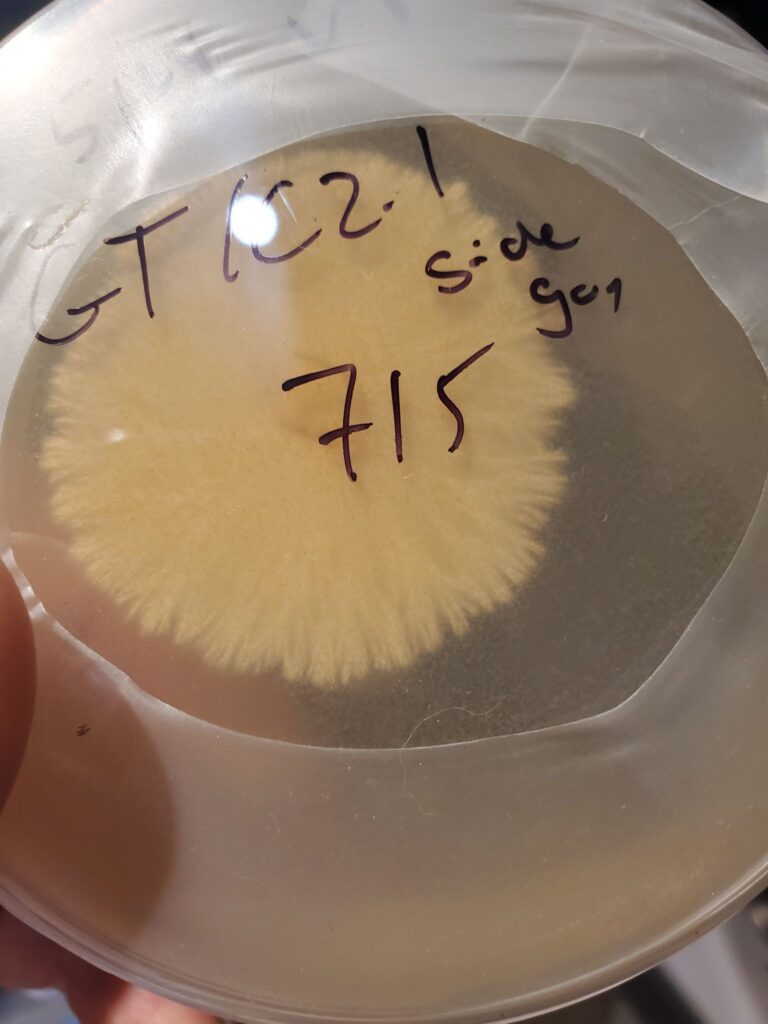
Not all mycelium grows the same, but you will know a healthy growth when you see it. There will be even and consistent expansion either in rhizomorphic (strandy) or tomentose (cottony) sections (or a combination of both - read more about mycelial sectors in our article on the topic).
There will not be wet spots, color changes, or separate colonies growing away from the center.
A contaminated liquid culture growing on agar is not a pretty sight. You may see slime from bacteria or mold rings. A good sign that you’ve got contamination is uneven growth patterns. Be careful not to confuse this with a mixture of rhizomorphic and tomentose mycelial sectors (read the article linked above). Now, even if you spot some contamination, if you caught it early on, there is still time to save the liquid culture! That is what we will talk about in the next section of this article.
This is usually the most reliable method to save your contaminated liquid culture. The agar plate will help you to identify clean mycelial sectors and then isolate and transfer them away from the contaminants. This method works well because it is easy to spot and avoid contamination so you can isolate the sector of healthy mycelium.
This method expands on the sector isolation technique described above. Basically, once you have isolated a clean mycelial sector on a fresh agar plate, you sandwich it with another clean agar plate above in order to save your contaminated liquid culture. The mycelium will grow upwards through the top agar plate and leave behind any residual contaminants on the bottom plate. This method works great because bacteria and mold cannot grow through solid agar, but mycelium can. You can never be too careful when it comes to contamination!
This is quite a fascinating technique to save a contaminated liquid culture that does not require much advanced knowledge at all. The basic premise is that mycelium grows faster than contaminants and we can use that to our advantage.
Want to avoid the whole rescue process? Sure, just take the necessary precautions to avoid contamination. For example, always flame sterilize your needles and work in a still airbox or flow hood. Use self-healing injection ports for your liquid cultures so no contaminants can sneak their way in.
What we consider the most useful method of preventing contamination is the use of a master agar plate. This is a plate of agar that you know for certain contains clean mycelium. It can be stored in a contaminant-free environment and used every time you want to make a new batch of liquid cultures.