Don’t worry. Making a DIY humidifier is not as hard as it may seem! We are going to lay it out nice and easy for you to follow along.
High humidity is not optional for growing gourmet mushrooms, it is absolutely essential. The goal is to mimic the natural environment in which mushrooms grow. This usually means mimicking places like the forest floor - high humidity, fresh airflow, and stable temperatures. Without proper humidity control, mushrooms simply won’t grow.
Now there are a number of ways to achieve the high humidity you want. It can be as simple as using a water mister, but it's time consuming to scale up using just a hand mister. Hand misting is usually only reasonable if you are growing a single tub of mushrooms. But if you have a larger operation, you’ll want a DIY humidifier that can humidify the whole room/tent. Bonus points if you can automate it!
In this article we are going to discuss proper humidity levels for growing gourmet mushrooms, how to build a DIY humidifier, specifically an ultrasonic fogger humidifier. We will also get into how to integrate it with your fruiting chamber and how to automate it (huge time saver). Finally, we will discuss troubleshooting common issues.
Specific humidity levels vary with the type of mushroom you are growing, but colonization typically requires about 70-80% RH (relative humidity) and fruiting occurs around 85-95% RH. For specifics on the strain of mushroom you wish to grow, give our article How to Use Liquid Cultures a read.
You may be tempted to purchase a cheaper cool-mist humidifier, but they are just not ideal for growing mushrooms. Sure, they can be great in your bedroom to make sleeping comfortable, but that is not the goal here. Store-bought humidifiers have weak airflow, inconsistent fog output, and are harder to automate. A DIY humidifier can fix all those issues. With just a few simple steps, we can make a humidifier that produces thick fog, is easy to scale and automate, and can be customized to your exact needs.
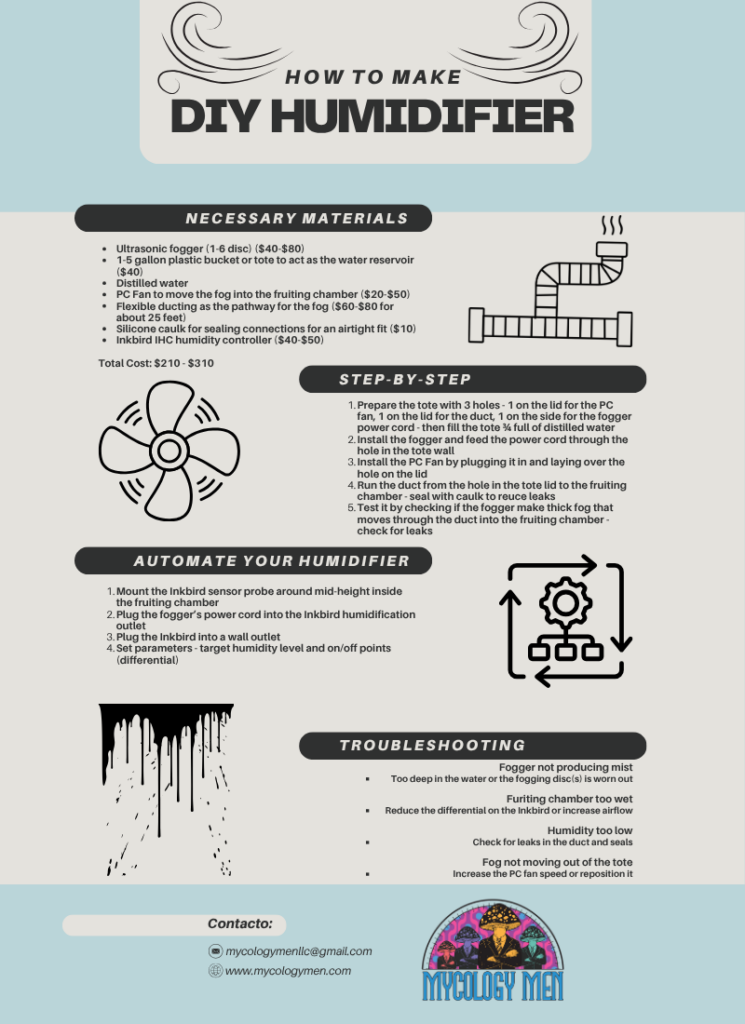
Total Cost: $210 - $310
You are going to need 3 holes in your tote and lid.
Finally, fill the tote about ¾ full with distilled water.
Place the fogger inside the tote and feed the power cord through the hole you made. The fogger should have instructions on how deep it should float for best results. The fogger may also come with a floater that can be used to achieve the ideal float depth.
Place the fan over the hole in the lid that you cut. It should be aimed so the air blows into the tote. Try not to air directly at the fogger or the duct. The goal is just to create a pressure difference inside the tote so that the fog flows into the duct and then into the fruiting chamber.
Run the duct from the hole in the tote lid you made to the fruiting chamber. Use silicone caulk to seal the connection to the tote lid so you can minimize fog loss.
Turn on the fogger and check that it is making a thick fog. Take notice of any leaks and seal them with your silicone caulk. Finally, check that the fog is flowing from the tote, through the duct, and into the fruiting chamber (the PC Fan should be running to force this airflow).
Automating the humidifier may seem like an unnecessary step, but trust us, spending the extra money on the Inkbird humidity controller will save you time and potentially money. As we mentioned, mushrooms require pretty specific humidity levels for growth. Too much or too little moisture is a bad thing. You probably don’t want to monitor humidity levels 24/7/ and you definitely don’t want to mess up your grow with too much or too little moisture.
Place it around mid-height and not directly in front of the inlet duct for most accurate readings.
This is how the device controls when to turn the fogger on and off.
Set the target humidity level (setpoint) and the differential. For example, if you make the setpoint 90% RH and the differential +/- 3%, the fogger will turn on at 87% RH and turn off at 93% RH.
You’re going to accumulate minerals. It’s a fact. Distilled water can make the mineral build up less severe, but it will still happen eventually. For this reason, you should clean the tote with diluted bleach every week. Also, replace the fogger discs every few months. The discs can be easily found online.
The fogger may be too deep in the water. Or, the fogging disc is worn out and needs replacing.
Reduce the differential on the Inkbird or increase airflow.
Check for leaks in the duct.
Increase the PC Fan speed for more airflow.